Can You Use a Shotgun Microphone Indoors
You can technically use a shotgun microphone indoors**, but you’ll likely encounter performance issues. Indoor reflections and room acoustics work against shotguns’ strength—rejecting off-axis sound. Phase cancellation and comb filtering degrade audio quality** in untreated spaces.
When considering whether to use a shotgun mic indoors, it’s crucial to understand that these directional microphones excel in outdoor environments where their lobar pickup patterns shine. Inside, however, the same characteristics that make shotgun microphones valuable for rejecting unwanted sound become problematic. Reflective surfaces bounce audio in ways that conflict with the mic’s polar pattern.
Cardioid microphones typically handle indoor reflections better than shotguns. For content creators, gamers, musicians, and professionals working in home studios or small rooms, a shotgun microphone for indoor recording** may not deliver the results you expect without significant acoustic treatment**.
If you’re committed to using a shotgun mic indoors, you’ll need close placement (4–8 inches from source), strategic positioning away from walls, and ideally some acoustic treatment with foam panels or bass traps. Understanding your specific room’s challenges before recording reveals whether a shotgun’s actually your best option for podcasting, streaming, gaming, or professional voiceover work.
For most affordable microphone solutions in treated or untreated indoor spaces, exploring alternatives alongside shotgun microphone indoor setup considerations helps creators make informed purchasing decisions that match their actual recording environment.
Key Takeaways
- Shotgun mics work indoors but struggle with room reflections and acoustics; cardioid mics often perform better in untreated spaces.
- Close microphone placement (4-8 inches) and positioning away from reflective surfaces significantly improves indoor shotgun mic performance.
- Test room acoustics with a clap test to identify echo and reverb issues before recording with shotgun microphones.
- Cardioid and hyper-cardioid patterns reject reflections more effectively than shotguns in typical untreated indoor environments.
- Temporary sound treatment with blankets or baffles can enhance shotgun mic results and reduce problematic indoor reflections.
Does a Shotgun Mic Work Indoors? The Honest Answer
Can you use a shotgun microphone indoors? Yes, but you’re working against the room itself. The short answer to “does a shotgun mic work indoors” is nuanced—while shotgun mics excel outdoors, indoor performance depends heavily on your space and technique.
Your shotgun’s interference tube rejects off-axis sound brilliantly outdoors, yet indoors it struggles with reflections bouncing off walls and ceilings. This is why many creators and streamers ask whether shotgun microphones work indoors before investing. You’ll encounter phase cancellation and comb filtering that thins your audio. Small diaphragm condensers demonstrate better off-axis performance and maintain superior audio quality when positioned away from your direct sound source. Hyper-cardioid microphones offer a balance between shotgun and cardioid patterns that can be beneficial in various recording environments.
Success hinges on indoor acoustics and microphone placement—keep the mic close (12 inches ideally), position it away from reflective surfaces, and treat your space when possible. Using acoustic panels to reduce reflections can significantly improve your indoor recording quality.
The reality of using a shotgun mic indoors reveals that untreated rooms present significant challenges. For gaming setups, podcasting, or music recording in typical bedrooms or offices, you’re likely better served by cardioid or hypercardioid alternatives that handle reflections more forgivingly.
However, if you’re committed to shotgun mic indoor recording, strategic placement near your sound source and acoustic treatment can yield professional results. Understanding whether a shotgun mic works indoors for your specific needs—whether podcasting, streaming, or recording music—comes down to weighing these practical limitations against your budget and setup flexibility.
When Shotgun Mics Fail Indoors: Your Room Assessment Checklist
You’ll need to identify reflective surfaces—bare walls, glass, high ceilings, and large tables—that’ll undermine your shotgun’s rejection pattern before you roll tape.
Test your space by clapping sharply and listening for quick repeats or a wash of reverb; if you hear either, reflections are already degrading your direct signal. Comb filtering effects from these early reflections can create a hollow, phasey quality that standard EQ cannot resolve. Precise microphone aiming is critical since off-axis rejection changes with even slight positional adjustments, which can either amplify or minimize unwanted room sound.
Red flags like low ceilings, hard flooring, and minimal soft furnishings mean you should either treat the room or abandon the shotgun for a cardioid mic.
Signs Of Reflective Rooms
Before a shotgun microphone can fail you indoors, your room’s acoustic character will broadcast clear warning signs—the hallmark indicators of reflective rooms that compromise audio quality. You’ll notice hard surfaces—glass, concrete, tile—dominating your space, creating reverberation effects that blur sound clarity immediately. Speech loses intelligibility as reflections overlap syllables, making dialogue muddy and fatiguing to process.
Identifying signs of reflective rooms is critical for anyone recording podcasts, streaming, or gaming with affordable microphones. These acoustic environments expose the limitations of even quality gear, making proper assessment essential before investing in equipment. The spatial nature of these problems means that equalization cannot address the fundamental issues created by your room’s reflective characteristics. When reflections arrive within 20-40 milliseconds, they blend with direct sound and create the characteristic muddiness that degrades speech intelligibility. Reflection filters can help reduce early reflections, though treating the entire room requires comprehensive acoustic solutions.
| Warning Sign | What You’ll Hear | Primary Cause |
|---|---|---|
| Echo/clap test | Distinct bounce-back | Parallel surfaces |
| Speech quality | Tinny, muffled tone | Early reflections |
| Stereo imaging | Wide, diffuse vocals | Comb filtering |
| Flutter echo | Metallic ringing | Hard boundaries |
You’ll detect these issues immediately—listen closely during your assessment. Understanding the signs of reflective rooms helps creators, musicians, and professionals distinguish between microphone performance issues and environmental acoustic problems. A reflective room can make even professional-grade recording equipment sound inferior, so recognizing these warning signs early saves time and money in your setup journey. When you hear these characteristic artifacts, you’re not experiencing microphone failure—you’re encountering a reflective room that requires acoustic treatment before your recording sessions can succeed.
Testing Your Space Acoustics
Once you’ve identified the warning signs of reflective surfaces in your space, testing your space acoustics becomes essential to measure your room’s actual acoustic performance and determine whether a shotgun microphone can work effectively indoors. Record a short spoken passage at your intended microphone placement to evaluate reverberation control and reflection management directly. Listen for hollow or metallic tones—indicators that reflected sound dominates your direct signal.
When testing space acoustics, measure microphone placement around 12 inches from the source, then assess audio clarity across different positions. Check hard parallel surfaces and test temporary sound treatment using blankets or baffles. This practical space acoustics testing reveals whether your room acoustics support shotgun recording techniques without expensive modifications. Different microphone brands like Rode, Sennheiser, Deity, Saramonic, and Shure exhibit varying performance characteristics across indoor environments.
For podcasters, streamers, and content creators working with affordable microphones, evaluating your space acoustics is crucial before investing in equipment. The acoustic environment directly impacts recording quality far more than many creators realize. Your room’s acoustic characteristics determine whether budget-friendly shotgun mics will deliver professional results or require supplementary treatment. Phasing issues from sound reflections bouncing off untreated walls can create unpredictable audio artifacts that are nearly impossible to fix during editing.
Rather than purchasing costly acoustic panels immediately, invest time in analyzing your space acoustics first. Move around your room, test different positions, and identify problem areas.
This methodical approach to assessing space acoustics ensures your affordable microphone investment performs optimally within your actual recording environment, whether you’re gaming, podcasting, or music recording.
Red Flags Before Recording
Before you hit record, identifying red flags before recording is essential for capturing clean dialogue with a shotgun microphone. Scan your space for bare drywall, glass, tile, and concrete—these hard surfaces create early reflections that hollow out dialogue and compromise audio quality.
Check ceiling height and wall distances; low ceilings feed reflections into the mic’s rear lobe, while corridors pull side-wall reflections into capsule slots. These are critical red flags before recording that many creators overlook during initial setup. Interference tubes in shotgun mics help reduce some side sound capture, but cannot fully compensate for heavily reflective indoor spaces.
Measure your mic-to-mouth distance; staying within 12–18 inches mitigates indoor recording challenges and reduces the impact of problematic room acoustics. This proximity sweet spot becomes your baseline before hitting record.
Identify existing soft furnishings like curtains or bookshelves that can absorb reflections—or note their absence as a red flag. During walkthroughs, if reflections sound obvious, you’ve found your warning zone. Background noise in your space can also reveal acoustic weaknesses and help you identify problem areas before they compromise your final recording.
Listen for hollow, phasey dialogue or flutter echoes that signal problem areas. For affordable microphone setups aimed at streamers, podcasters, and gamers, understanding these red flags before recording separates mediocre audio from professional-sounding results.
Document these trouble spots and plan your mic placement accordingly. This pre-recording assessment transforms your space from a liability into an asset, ensuring your affordable microphone investment delivers maximum performance regardless of your budget constraints.
Better Microphone Choices for Most Indoor Recording
You’ll find that cardioid patterns give you the rejection you need for typical room reflections and ambient noise, making them far more practical than shotgun mics for most indoor work. Omnidirectional microphones, by contrast, pick up sound from all directions and are generally better suited for capturing ambient environments rather than controlled indoor recording spaces.
If you’re after greater detail and air in a treated space, pencil condensers deliver that clarity without the off-axis coloration issues that plague shotgun designs indoors. Models like the Audio-Technica AT2020 offer excellent sound quality at an affordable price point, making them ideal for indoor recording applications.
Your choice ultimately depends on your room’s acoustic treatment and the specific noise sources you’re battling—not on microphone type alone.
Cardioid Patterns For Control
Because most home recording spaces lack professional acoustic treatment, cardioid microphones offer the practical balance you’ll need between isolation and natural tone. Understanding cardioid patterns for control is essential for maximizing your microphone’s capabilities in untreated environments.
Position your mic’s rear toward unwanted noise sources—fans, computers, reflections—where the null rejection reaches -20 to -30 dB below on-axis. This directional design reduces ambient sound by approximately 67%. The cardioid pattern’s control allows you to strategically manage what gets captured and what gets rejected, giving you command over your recording space without expensive acoustic treatment.
For ideal placement, maintain 4–8 inches from your mouth, speaking directly into the front for strongest pickup and consistency.
Mastering cardioid patterns for control means leveraging this pickup behavior to your advantage—slight off-axis angles minimize plosives while preserving the tight sound control you need for professional results.
These cardioid control patterns make the microphone the industry standard for solo vocals, podcasting, and streaming in untreated rooms where you need reliable isolation without complexity.
Whether you’re building a budget-friendly home studio, starting a podcast, or upgrading your streaming setup, the cardioid pattern’s directional control**** delivers the precision and consistency that creators, gamers, and professionals demand from affordable microphones.
This fundamental design principle remains the foundation of effective home recording across every stage of the buying journey.
Pencil Condensers As Alternatives
While cardioid patterns excel at rejecting rear-axis noise, they’re not always the best solution for indoor dialogue and speech recording. Pencil condensers as alternatives offer a practical choice that many professionals prefer for interior work. Their compact design lets you position them closer to talent, improving signal-to-noise ratio without relying solely on directionality. Unlike shotguns, pencil condenser alternatives avoid excessive room coloration indoors. You’ll capture cleaner dialogue by combining proximity with room treatment rather than fighting architectural acoustics. For creators and recording professionals seeking budget-friendly options, pencil condensers serve as excellent alternatives to expensive shotgun setups, delivering superior indoor dialogue clarity that cardioid shotguns often struggle to achieve.
Whether you’re podcasting, streaming, or recording professional dialogue, considering pencil condensers as alternatives to directional microphones can significantly improve your audio quality. These versatile condensers provide the placement flexibility needed for consistent proximity gain—a critical advantage when recording in untreated rooms. Musicians and podcasters frequently discover that pencil condenser alternatives outperform shotguns in real-world interior environments by capturing accurate, uncolored dialogue without the proximity-dependent artifacts of highly directional designs.
| Feature | Shotgun | Pencil Condenser |
|---|---|---|
| Room capture | Higher | Lower |
| Placement flexibility | Limited | Excellent |
| Indoor dialogue | Colored | Accurate |
| Proximity advantage | Minimal | Significant |
Pattern Selection By Room
Medium rooms with some absorption benefit from shorter shotguns positioned close to your source—typically within four feet—and aimed carefully.
When making your pattern selection by room, consider how different microphone types interact with your specific environment. Controlled, treated studios accommodate longer interference-tube designs more reliably, while your room-based pattern selection strategy should account for existing reflective surfaces.
Your microphone positioning strategy should match your environment: closer placement reduces room interaction regardless of pattern type. This pattern selection approach for your room applies whether you’re streaming, podcasting, or recording music.
Assess your walls, ceiling, and reflective surfaces before selecting gear—this foundational step ensures your pattern selection by room delivers optimal results. Understanding polar patterns in microphones helps you make informed decisions about which design works best for your specific space.
Room treatment improvements always expand your mic options and recording flexibility, making your initial pattern selection by room more versatile over time.
For creators, gamers, and musicians on a budget, understanding how to match your microphone’s pattern to your room’s characteristics is essential for achieving professional sound without expensive equipment upgrades.
How to Actually Place a Shotgun Mic Indoors (If You’re Using One)
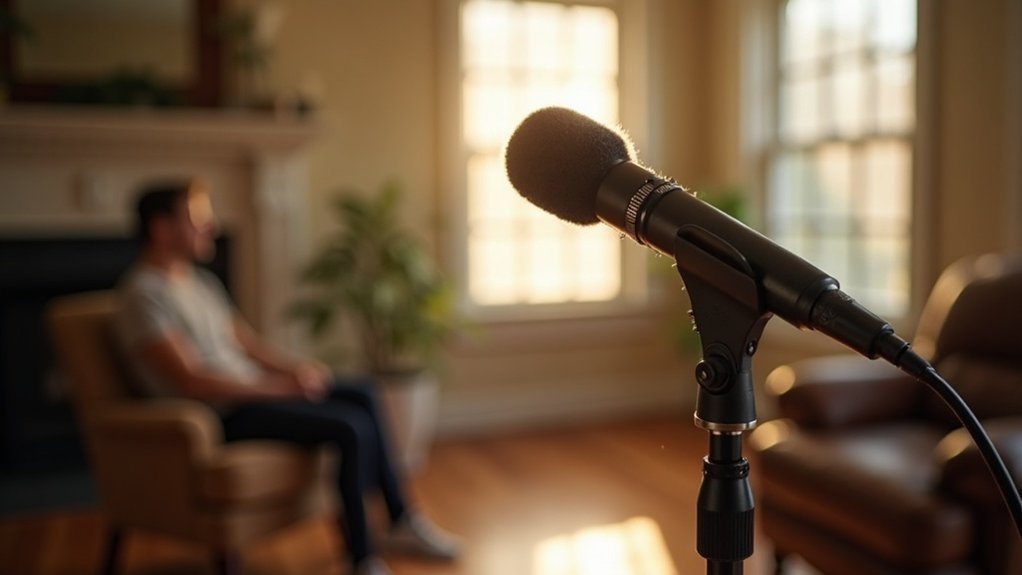
Since distance control matters more than a shotgun’s narrow polar pattern when you’re recording indoors, you’ll want to mount your mic off-camera on a boom, stand, or c-stand rather than directly on your camera body.
Your mic placement techniques and boom positioning tips determine dialogue clarity far more than the microphone itself. How to actually place a shotgun mic indoors comes down to understanding that proximity beats pattern every time in interior spaces.
Mic placement and boom positioning matter more than the microphone itself—proximity beats pattern indoors.
- Position the mic 4–8 inches from the speaker’s mouth, angled downward — this is the foundation of actually placing a shotgun mic indoors effectively.
- Keep the rear facing absorbent surfaces like carpet or curtains.
- Avoid reflective surfaces and corners that introduce room coloration.
- Test your actual space before rolling to catch acoustic issues.
Shotgun microphones are highly directional instruments, and their effectiveness relies on the supercardioid pickup pattern that rejects off-axis sound, which becomes less critical when you’re working in controlled indoor environments with proper mic placement.
When placing a shotgun mic indoors, remember that your mic placement techniques and boom positioning tips determine dialogue clarity far more than the microphone itself.
Whether you’re podcasting, streaming, gaming, or recording professional content, how you actually place a shotgun mic indoors will have a greater impact on your final audio than the gear’s specifications.
Proximity beats pattern every time indoors — this principle should guide all your placement decisions in interior recording environments.
Why Indoor Reflections Ruin Shotgun Audio: And What to Do About It
Because shotgun microphones rely on an interference tube designed for open-air rejection, they’re uniquely vulnerable to the hard surfaces that dominate indoor spaces—making indoor reflections ruin shotgun audio quality in ways that cardioid or omnidirectional mics simply don’t experience. Reflections entering side slots create comb filtering—hollow, phasey dialogue that’s difficult to fix in post. You’ll hear metallic, thin, or boomy vocals depending on room geometry. Understanding how indoor reflections affect shotgun microphones is critical whether you’re podcasting, streaming, or recording voiceovers on a budget.
| Problem | Cause | Solution |
|---|---|---|
| Comb filtering | Direct + reflected sound within 1–25 ms | Acoustic treatment |
| Off-axis capture | Side lobe leakage | Strategic microphone placement |
| Unpredictable phasing | Hard walls/ceilings | Absorption blankets |
| Low-end mudiness | Floor/ceiling bounce | Room dampening |
How indoor reflections ruin shotgun audio comes down to physics: your mic captures both direct and delayed sound, and the interference creates frequency cancellations. Smart placement plus absorption beats relying on reflections you can’t control. For creators working with affordable shotgun setups, addressing why indoor reflections damage shotgun microphone performance before recording saves hours of troubleshooting in post-production. Treat your recording space intentionally, and you’ll get broadcast-quality results without expensive gear upgrades.
Shotgun Mics That Work Indoors: Real-World Use Cases and Realistic Expectations
Indoor recording techniques demand precision:
- Position the boom 3–5 feet overhead, keeping speakers on-axis.
- Choose shorter shotguns or hypercardioid condensers over long interference-tube designs.
- Maintain 12 inches proximity when feasible for best rejection.
- Use foam windscreens to minimize air vent and handling noise.
When implementing shotgun mics that work indoors** for podcasting, streaming**, or voiceover work, remember you’re managing directionality, not eliminating room sound. Well-damped spaces outperform untreated rooms considerably. Understanding microphone placement distance principles helps you position your shotgun mic at the optimal distance from your sound source to maximize rejection of room reflections.
Understanding how shotgun mics work indoors means recognizing that success requires controlled setups and consistent technique—not gear alone.
Gamers and streamers often discover that these affordable microphones deliver better results than expected when paired with proper placement strategy and room treatment.
Real-world indoor shotgun mic use cases consistently show that technique and environment matter more than throwing money at high-end equipment.