
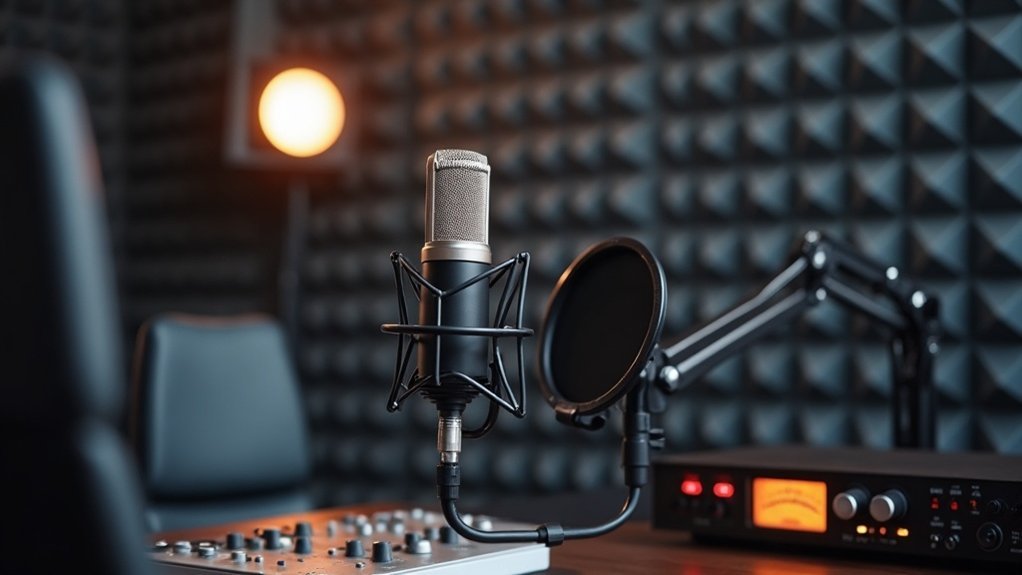
You can absolutely use a condenser microphone for podcasting, and it’s a legitimate choice for creators serious about audio quality. However, when considering whether you should use a condenser microphone for podcasting, your room environment matters more than the gear itself. Condensers’ high sensitivity captures vocal nuances brilliantly—articulation, breath, and detail—yet that same sensitivity picks up unwanted ambient noise, chair creaks, and traffic sounds.
For successful podcasting with a condenser microphone, you’ll need a quiet, acoustically treated space with strategic mic placement, phantom power, and proper gain staging. Before you commit to using a condenser microphone for your podcast setup, understand that without these environmental controls, you’re better served by a dynamic microphone‘s natural noise rejection.
The decision to use a condenser microphone for podcasting ultimately depends on several critical factors: your existing acoustic environment, your budget for treatment materials, and your willingness to optimize gain structure. Many affordable condenser options exist for podcasters willing to invest in room treatment, making it possible to achieve professional results without premium equipment. The key is matching your microphone choice—whether it’s a condenser or dynamic—to your actual recording conditions and workflow needs as a content creator.
Key Takeaways
- Yes, condenser microphones excel at capturing vocal details and articulation, making them ideal for high-quality podcast recordings.
- Condensers require a quiet, treated recording environment to prevent picking up unwanted background noise and room reflections.
- Proper room acoustics, acoustic panels, and strategic mic placement significantly impact condenser performance more than microphone choice alone.
- USB condenser mics offer simplicity for solo podcasters, while XLR models provide flexibility and independent component upgrades.
- Dynamic microphones may be more practical for untreated spaces due to superior noise rejection compared to sensitive condensers.
Yes, But Your Room Matters More Than the Microphone
Although condenser microphones deliver excellent tonal clarity, they’re fundamentally limited by acoustic environment. Your room matters more than the microphone—this principle separates professional creators from those chasing gear specs. Your recording environment determines whether you achieve professional audio or amateur results, regardless of microphone quality.
Room acoustics directly influence vocal clarity; hard surfaces amplify reflection reduction challenges that even premium condensers can’t overcome. Strategic mic placement within treated spaces outperforms expensive gear in untreated rooms. For podcasters, streamers, gamers, and musicians working with affordable microphones, understanding that your room matters more than the microphone fundamentally changes your approach to setup. Dynamic microphones like the Shure SM7dB naturally reject room reflections because their heavy diaphragm requires significant acoustic energy to capture sound effectively.
Soundproofing techniques—curtains, rugs, acoustic panels—manage ambient noise more effectively than microphone upgrades. Acoustic panel treatment reduces first-reflection points and minimizes reverb that condensers capture, proving the room matters more than the microphone investment. Your recording environment’s absorption characteristics matter more than condenser sensitivity or boutique equipment. Soft furnishings and strategic panel placement on critical zones reduce echo without requiring expensive gear replacements.
This reality empowers budget-conscious creators: investing in room treatment and ideal mic placement yields superior results than chasing expensive microphone specifications alone.
Whether you’re recording podcasts, streaming gameplay, or capturing music, the principle remains constant—your room’s acoustic properties matter more than the microphone sitting on your desk. Treating your space transforms even affordable microphones into professional-sounding tools.
Does Your Space Meet These Condenser Requirements?
Now that you understand room acoustics trump microphone quality, you need to assess whether your specific space can actually meet these condenser requirements****.
Evaluate your room geometry first—irregular shapes outperform perfect rectangles. Next, audit surface treatment: identify reflective problem areas like bare walls, glass, or hard floors.
Condenser requirements also demand measuring working distances of 5–12 inches from your mouth. Turn off HVAC, computers, and electronics. Untreated rooms under 150 sq ft can introduce 8-12dB of delayed reflection in the 2-5kHz range, which condensers will readily capture.
If your space lacks soft furnishings, foam panels, or curtains, you’ll need additional absorption to satisfy basic condenser mic requirements. Condenser microphones require phantom power to operate, which must be supplied by your audio interface or mixing board. Cardioid dynamic microphones are more forgiving in untreated spaces since they effectively reject room noise through their directional pickup pattern.
Honestly assess background noise levels. Beyond the technical specs, understand that meeting condenser requirements means your space must be intentionally designed for sensitive microphone use.
Consider whether your room geometry, ambient conditions, and acoustic treatment align with what condensers demand.
You’re ready for a condenser only when reflections are controlled, ambient sound stays minimal, and your space genuinely meets these condenser requirements.
For creators, gamers, musicians, and professionals on a budget, this upfront assessment prevents costly equipment mistakes and ensures your affordable condenser microphone performs at its potential for podcasting, streaming, gaming, or recording applications.
Why Condensers Capture Vocal Detail (And Why It Requires Quiet)
Condenser microphones capture vocal detail through high sensitivity and extended frequency response, which means you’ll hear breath, consonant articulation, and harmonic overtones that dynamic mics typically mask.
This same sensitivity that reveals nuance also picks up every environmental sound in your space—chair creaks, traffic, HVAC noise—making a quiet recording environment non-negotiable for podcast quality. For untreated rooms with persistent background noise, dynamic mics offer better rejection of off-axis sound and may be a more practical choice. Since condensers require phantom power for optimal performance, ensure your audio interface or mixer can provide this essential power supply. The diaphragm’s capacitive design allows condensers to respond to even the smallest vibrations, which contributes to both their sensitivity and their susceptibility to ambient noise.
You’re fundamentally trading the mic’s ability to isolate your voice for its ability to reproduce it with transparency, so room control directly determines whether that detail becomes an asset or a liability.
High Sensitivity Picks Everything
Because a condenser microphone‘s charged capacitor capsule and thin diaphragm respond to sound waves with exceptional precision, you’ll capture vocal nuances—breath, articulation, and dynamic shifts—that less sensitive designs miss. However, this high sensitivity picks everything characteristic of condensers cuts both ways: the same responsiveness that enables detailed vocal capture also picks up room reflections, ambient noise, and mechanical vibrations alongside your voice. Your noise management strategy becomes critical.
Understanding that high sensitivity picks everything means recognizing both the advantage and the challenge. Untreated walls, traffic, and chair creaks become prominent in recordings when your microphone exhibits this high-sensitivity trait. The very quality that makes condensers ideal for capturing professional vocal detail also means every environmental element gets recorded with equal fidelity. Condenser microphones typically feature a lower noise floor compared to dynamic alternatives, which further amplifies the importance of environmental control in your recording space. Microphone sensitivity specifications determine the voltage output level your microphone produces in response to sound pressure.
This high sensitivity picks everything reality demands a controlled environment—ideally a treated booth or studio space—to let detail capture dominate over environmental coloration and preserve the vocal clarity you’re pursuing. Studies of tested condenser microphones show that military-grade ceramic coating and professional-grade construction help maintain recording quality even in challenging acoustic conditions.
For affordable microphone users working in less-than-ideal spaces, understanding high sensitivity picks everything helps you make informed decisions about whether a condenser suits your recording setup or whether you’d benefit from a less sensitive dynamic microphone alternative.
When shopping for microphones for podcasting, streaming, or vocal recording, remember that microphone sensitivity specifications directly impact what you’ll record.
Budget-conscious creators must weigh whether a sensitive condenser’s superior detail justifies the additional acoustic treatment investment, or whether a less sensitive design better matches your current environment and resources.
Frequency Response and Clarity
Condenser mics typically deliver flat or gently shaped responses across 20 Hz to 20 kHz, capturing vocal clarity through precise high-frequency reproduction. Their lightweight diaphragms react quickly to fast-changing sound waves, preserving fine articulation and consonant detail. USB condenser microphones simplify this setup by drawing power from computers, eliminating the need for external phantom power supplies. Models like the Audio-Technica AT2020 exemplify this affordability with a frequency response of 20 Hz to 20 kHz, making professional-grade clarity accessible to budget-conscious podcasters. Unlike dynamic microphones, condensers offer superior sensitivity to subtle vocal nuances, which can significantly enhance podcast production quality.
Many vocal condensers include a presence lift around 3–6 kHz to enhance intelligibility without heavy EQ—a critical consideration for podcasters and streamers seeking professional-sounding results on a budget.
Frequency response and clarity work hand-in-hand to determine how well your microphone captures the nuances of your voice or instrument. However, this exceptional detail capture means room noise and background sounds are equally reproduced with accuracy, demanding quieter recording conditions than dynamic alternatives.
For creators and gamers working in untreated spaces, understanding how a microphone’s frequency response affects clarity helps you make informed decisions about which affordable mic will best suit your setup, whether you’re recording podcasts, streaming, or creating content that demands pristine audio reproduction.
Quiet Environment Becomes Essential
The sensitivity that makes condenser microphones excel at capturing vocal detail—their lightweight diaphragms responding to minute air-pressure fluctuations—also makes them unforgiving of background noise. You’ll capture room reflections, chair creaks, and ambient sound alongside your voice. This heightened transient response reveals breath, sibilance, and consonant clarity with precision, but it exposes unwanted artifacts too. Your podcast acoustics directly determine whether this detail sounds polished or harsh.
A quiet environment becomes essential when working with condenser microphones. Unlike dynamic alternatives that naturally reject off-axis noise, condensers demand that you establish an essential quiet environment for professional results. This isn’t optional—it’s fundamental to leveraging what makes condensers valuable in the first place. Unlike omnidirectional microphones, which pick up sound from all directions equally, condensers require strategic positioning and environmental control to minimize unwanted pickup.
Effective recording techniques require controlling your space: treating reflective surfaces, minimizing external noise, and selecting a quiet location. Room treatment matters more with condensers than dynamic alternatives because the microphone reproduces your environment with high accuracy.
Whether you’re podcasting, streaming, gaming, or recording music, understanding why quiet environments become essential separates polished productions from amateur recordings.
Consider this part of your setup strategy. As you evaluate affordable microphone options for your needs, factor in your existing acoustic environment. The best budget condenser microphone won’t perform well in a noisy space—but the same mic in a controlled setting delivers results that rival expensive alternatives.
Your investment in acoustic treatment pays dividends across all your recording projects, ensuring that essential quiet environment requirements don’t compromise your microphone investment.
Condenser vs. Dynamic: Which Mic Type Fits Your Setup?
You’ll encounter a fundamental trade-off between microphone sensitivity and room noise control: condensers pick up more detail from your space, including air conditioning hum and echo, while dynamics reject background sound by focusing primarily on direct vocal input.
Your room’s acoustic treatment directly determines whether that sensitivity becomes an asset or a liability—a treated studio environment lets you leverage a condenser’s detailed capture, whereas an untreated home office will expose acoustic flaws that a dynamic mic would naturally suppress.
Dynamic microphones excel at isolating vocals by design, making them particularly effective when room treatment isn’t available or practical for your podcasting setup.
Matching your mic type to your actual recording environment, rather than choosing based on theoretical performance alone, delivers more consistent podcast results.
Room Noise And Control
Several factors determine whether a condenser or dynamic microphone performs better in your podcast space, and room noise and control matters more than mic type alone.
Condenser mics capture 3–5 dB more ambient noise than dynamics in untreated rooms, making noise reduction through room control essential for clean recordings. You’ll achieve better results by adding soft materials behind and beside yourself, positioning the mic close to your mouth, and recording toward the room’s deadest area—core strategies in managing room noise.
Dynamic mics require less room noise control due to their proximity-dependent design, making them forgiving choices for less-treated spaces.
However, a well-treated space lets condensers outperform dynamics placed carelessly, proving that strategic room control unlocks superior performance from sensitive microphones.
Your setup choices—placement, treatment, and distance—ultimately determine audio quality more than microphone selection.
Whether you’re streaming, gaming, or producing podcasts on a budget, prioritizing room noise management and acoustic treatment delivers measurable improvements across all affordable microphone options.
Professional room control techniques cost far less than upgrading your mic, making this foundational setup work the smartest investment for creators at every stage of their recording journey.
Microphone Sensitivity Trade-Offs
When evaluating sensitivity trade-offs in microphones, match sensitivity to your actual vocal level and preamp range, not microphone type alone. Selecting the right microphone requires understanding how microphone sensitivity impacts your specific vocal characteristics and recording environment. This approach ensures you’re making informed decisions during the buying journey, whether you’re streaming, podcasting, gaming, or recording music on a budget.
The right sensitivity trade-off for your affordable microphone setup balances noise performance with headroom, giving you professional results without breaking the bank.
Condenser Mic Gear Essentials: What to Buy First
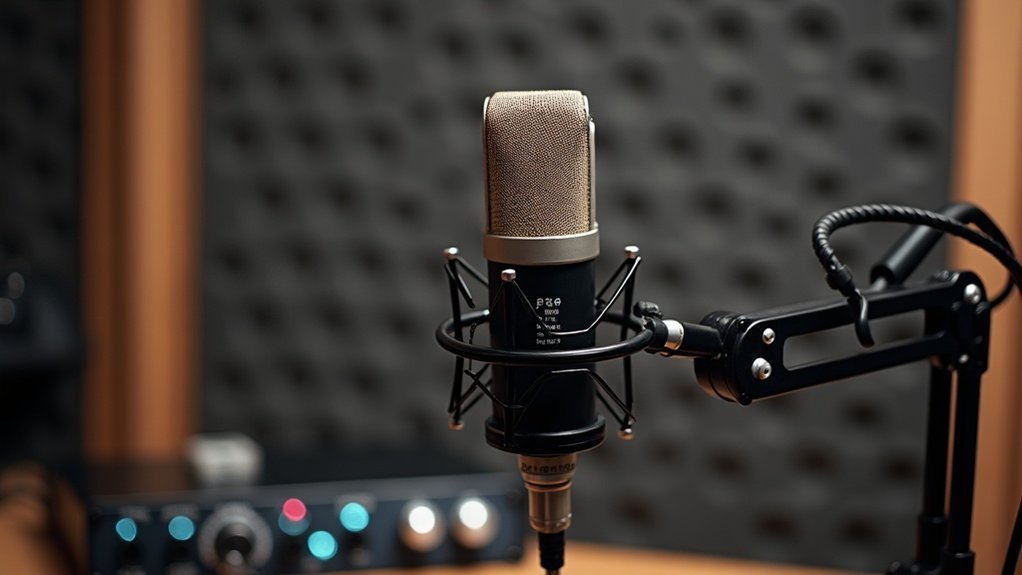
USB condensers require only a computer connection, while XLR models demand an audio interface and phantom power—both core components of quality condenser microphone gear. A USB audio interface serves as the central hub for routing your XLR condenser microphone signals directly into your computer for recording and processing. Invest in closed-back headphones for real-time monitoring, a boom arm or shock mount to isolate vibration, and acoustic treatment to control room reflections. These components work together systematically as part of your essential condenser mic gear setup.
| Gear Category | Essential Item | Purpose |
|---|---|---|
| Connectivity | Audio Interface (XLR) or USB Connection | Route audio signals to computer |
| Monitoring | Studio Headphones | Detect clipping and background noise |
| Isolation | Shock Mount & Boom Arm | Reduce mechanical vibration transfer |
| Environment | Acoustic Panels | Control room reflections and ambient noise |
For creators, gamers, musicians, and professionals building their first recording setup, prioritizing these condenser mic gear essentials ensures you’re investing wisely in components that directly impact audio quality. Rather than buying everything at once, focus on the connectivity solution that matches your condenser microphone type, then add monitoring and isolation gear to complete your foundational condenser mic gear investment.
Mic Placement, Pop Filters, and Plosive Control Explained
- Position the capsule’s active side toward your mouth, maintaining consistent distance via a boom arm—this foundational mic placement technique ensures every word captures with precision.
- Add a pop filter 5–10 cm from the mic if plosives persist after angle adjustment; this physical barrier provides secondary plosive avoidance when positioning alone falls short. A pop filter’s mesh material construction disperses air bursts before they reach the microphone capsule, significantly reducing unwanted plosive artifacts.
- Refine mic placement by ear to balance vocal clarity, warmth, and room interaction, adjusting both distance and angle until your voice sounds natural and controlled.
These specifications guarantee professional-grade capture. Whether you’re streaming, podcasting, or recording music, understanding how pop filters work alongside proper microphone positioning transforms your audio from amateur to polished.
Investing time in mastering plosive control techniques pays dividends across every recording session.
USB or XLR: Which Condenser Path for Your Podcast?
How you route your condenser microphone’s signal fundamentally shapes your recording workflow, scalability, and long-term upgrade potential. When deciding between USB or XLR for your condenser microphone, each path offers distinct advantages for podcast creators at different stages.
USB advantages include single-cable setup and lower upfront costs—ideal for solo podcasters seeking immediate ease. A USB condenser microphone eliminates the need for additional gear, making it perfect for beginners launching their first show.
XLR benefits emerge when you need recording flexibility through external audio interfaces, enabling independent component upgrades and multi-mic expansion. The XLR condenser path delivers superior gain staging and separate channel management, essential as your production demands grow. Unlike USB microphones, XLR connections allow you to swap microphones without changing your entire signal chain, providing greater long-term flexibility.
For beginner podcasters, USB condenser microphones favor simplicity and portability. However, XLR’s scalability options**** suit growing studios planning multi-guest episodes or future equipment investments.
Cost considerations matter significantly: USB starts cheaper but limits portability and production control. XLR demands higher initial investment yet offers professional audio interface integration and expandability that USB can’t match.
The choice between USB versus XLR for condenser microphones depends on your current needs and growth trajectory. Choose USB for immediate ease and minimal setup; choose the XLR condenser approach when your show demands expandability, professional audio interfaces, and component flexibility.
Your podcast’s technical foundation should match both your budget and your vision for scaling.
When a Dynamic Microphone Is the Smarter Choice Instead
Dynamic microphones are particularly effective in live settings and podcasting environments where their natural noise rejection and durability provide practical advantages over more sensitive alternatives.
For creators, gamers, and musicians working with budget constraints, dynamics deliver professional results without the technical overhead.
Your practical constraints often make when a dynamic microphone is the smarter choice obvious: no need for preamps, less sensitive to room imperfections, and more forgiving of real-world recording scenarios.
Whether you’re streaming from a bedroom setup or podcasting in a home office, understanding why a dynamic microphone is the smarter choice helps you make confident purchasing decisions that align with your actual environment rather than idealized studio conditions.








