
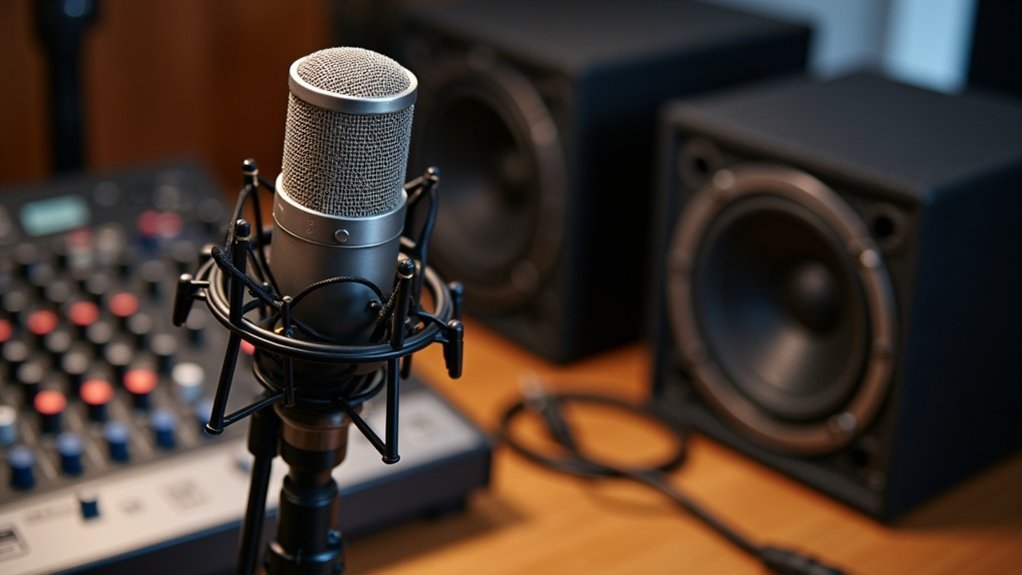
You can’t use standard condenser microphones without phantom power—they won’t produce audio output. These mics require 48V DC voltage delivered through XLR pins 2 and 3 to power their internal preamplifier and capacitive element. However, understanding whether you can use a condenser microphone without phantom power is crucial for creators and musicians setting up affordable recording solutions.
Several microphone types don’t require phantom power. Battery-powered condensers, USB condensers, and electret designs operate independently, making them excellent options for podcasters and streamers seeking budget-friendly alternatives. Dynamic microphones also function without phantom power, offering flexibility for gaming setups and live recording scenarios.
When learning how to use a condenser microphone without phantom power, consider your specific recording environment. For professional streaming and podcast recording, knowing your microphone’s power requirements prevents costly mistakes and guarantees peak performance. Many beginner-friendly condensers marketed for affordable home studios explicitly feature phantom-free operation.
Using a condenser microphone without phantom power becomes straightforward once you identify your mic’s specifications. Check your equipment manual, consult honest reviews from microphone comparison guides, and verify XLR pin configurations. Whether you’re upgrading from entry-level gear or building a complete recording setup, understanding these technical requirements ensures you select the right microphone for your podcasting, streaming, gaming, or professional recording needs without unnecessary complications or performance issues.
Key Takeaways
- Most standard condenser microphones require 48V phantom power to operate; without it, they produce no audio signal.
- Some beginner condenser models and electret condensers may function with minimal bias voltage instead of full phantom power.
- Battery-powered and USB condenser microphones don’t require phantom power, drawing energy from alternative sources like batteries or USB connections.
- Silent condenser mics typically indicate power issues rather than equipment damage; enabling phantom power often resolves the problem immediately.
- External phantom power supplies or audio interfaces can provide phantom power when mixers lack built-in phantom power capabilities.
Do Condenser Microphones Need Phantom Power? The Direct Answer
Why Do Condenser Microphones Need Phantom Power?
Your condenser mic’s internal electronics need voltage to function, which is why most condenser microphones require phantom power. Standard studio condensers demand 48V phantom power delivered through XLR cables, though the range spans 11–52V DC. Understanding whether condenser microphones need phantom power is essential before purchasing one for podcasting, streaming, or recording.
Most condenser microphones require 48V phantom power through XLR cables to function properly, though voltage ranges from 11–52V DC.
However, you’ve got power alternatives depending on your condenser types. Battery-powered models operate independently, making them ideal for mobile recording setups. USB condensers draw power through their connector, eliminating the need for phantom power entirely—perfect for streamers and gamers using standard computer interfaces.
Tube designs use external supplies, while electret condensers might need only bias voltage rather than full phantom power. External phantom power supplies can be utilized if your preamp or mixer lacks built-in phantom power capabilities. The diaphragm and internal preamp in condenser microphones rely on this voltage to convert sound waves into electrical signals.
If you’re asking “do condenser microphones need phantom power?” the answer depends on your specific model and setup. Some affordable condenser microphones designed for beginners don’t require phantom power at all, making them more accessible for creators just starting their podcasting or streaming journey.
Without adequate power, you’ll experience absent or extremely weak output signals, ruining your recording or stream quality. This is why understanding your microphone’s power requirements is crucial for both professionals and hobbyists.
Always consult your specification sheet—it’s your definitive guide for determining your microphone’s exact power requirements before connecting it to your audio interface or mixer.
How Phantom Power Works (And Why It Matters)
When you activate phantom power on your mixer or audio interface, you’re sending a 48V DC voltage equally through pins 2 and 3 of a balanced XLR cable while maintaining pin 1 as ground reference.
This DC current superimposes onto your audio signal without interfering with the balanced transmission, effectively powering the condenser microphone‘s internal preamplifier and capacitive element through the same cable that carries your sound. Understanding why condenser microphones need phantom power is essential for anyone working with professional audio equipment.
Your microphone’s active circuitry relies on this voltage to convert acoustic vibrations into usable electrical signals, making phantom power the standard method for operating professional condenser microphones. However, improper phantom power handling can damage equipment if unbalanced cables or incompatible devices are connected without protection. Electret microphones, however, have pre-charged capacitors and do not require external phantom power to function.
DC Voltage Through XLR
Phantom power delivers a DC supply through balanced XLR microphone cables—most commonly +48 V DC—by applying equal voltage to pins 2 and 3, with pin 1 serving as the ground/shield reference. Understanding DC voltage through XLR connectors is crucial for anyone setting up professional recording equipment. This voltage travels through matched 6.81 kΩ resistors down both signal conductors toward your condenser microphone.
The circuit design guarantees symmetrical DC bias across balanced audio pairs, allowing power delivery and signal transmission simultaneously. When working with DC voltage through XLR configurations, return current flows through the shield, completing the circuit and maintaining signal integrity. Most condenser microphones require only a few milliamps of current to power their internal preamplifier circuits effectively. According to IEC 61938 standards, matched resistor specifications prevent DC offset and ensure proper audio signal transmission without degradation.
This standardized approach adheres to IEC 61938 production standards, enabling XLR connectors to carry both power and audio without interference—essential for condenser types requiring external DC voltage specifications. For creators, podcasters, and streamers, properly managing voltage through XLR cables ensures your condenser microphone operates optimally without noise or signal degradation.
Knowing how DC voltage travels through XLR connections helps you troubleshoot phantom power issues and select compatible equipment. Whether you’re recording vocals, instruments, or streaming content, understanding this balanced power delivery mechanism prevents equipment damage and ensures consistent audio quality.
The elegant design of DC voltage through XLR architecture demonstrates why balanced connections remain the industry standard for professional microphone setups across recording studios, broadcast facilities, and high-end streaming configurations.
Powering Active Microphone Circuitry
Because condenser microphones contain active electronic circuitry—impedance converters, buffer amplifiers, and signal conditioning circuits—they require external DC power to function. Understanding powering active microphone circuitry is essential for anyone setting up recording equipment, whether you’re a podcaster, streamer, gamer, or musician.
You’ll find phantom power serves as the standard power source for professional microphone types, delivering 48V through balanced XLR cables. This voltage appears equally on pins 2 and 3, keeping your audio signal balanced while supplying the necessary current that powers active microphone circuitry without degrading signal quality. The precision-matched resistors in phantom power supplies maintain zero volts between active conductors, ensuring clean audio transmission alongside DC power delivery.
For content creators and professionals working with condenser microphones, mastering the basics of powering microphone circuitry ensures reliable performance during critical recording sessions. The IEC 61938:2018 standard outlines the technical specifications for phantom power to ensure consistency across professional audio equipment.
Different microphone types demand varying approaches to powering active circuitry. Some electret condensers use batteries or USB power instead of phantom power, making it crucial to check your specific equipment’s requirements.
Streamers and podcasters especially need to understand whether their setup supports phantom power delivery or requires alternative power solutions.
Getting the specifics of your microphone’s power requirements guarantees you’re selecting compatible equipment and avoiding connectivity issues that compromise signal quality and performance.
Whether you’re building an affordable home studio or upgrading your gaming and streaming setup, proper knowledge of powering active microphone circuitry is fundamental to achieving professional-quality audio without costly mistakes or equipment incompatibilities.
How to Identify Your Condenser Mic’s Power Requirements
You’ll need to check your microphone’s manual first for specifications like “48V phantom,” “P48,” or voltage ranges such as 11–52 V, which clearly indicate phantom power requirements.
Next, identify whether you’re working with a true condenser, electret condenser, or active design—each has distinct power needs that determine if phantom power, battery, USB, or external supplies will work. Phantom power is a standard DC voltage sent through XLR cables that allows condensers to function without built-in batteries or alternative power sources.
Finally, test your audio interface or mixer’s power source by locating its 48V switch, checking for a phantom power indicator, or using a voltage meter on the XLR pins to confirm whether it can actually deliver the required voltage. Ribbon microphones can suffer permanent damage if phantom power is accidentally enabled, so always verify your microphone type before powering on the 48V supply.
Check The Microphone Manual
Check your microphone’s manual immediately—it’s your most reliable resource for accurate power supply specifications. This foundational step applies whether you’re setting up a budget podcasting mic, a gaming headset, or professional recording equipment. Manufacturers detail microphone compatibility requirements in dedicated powering or specifications sections, making the manual your essential reference guide.
You’ll find critical language like “requires 48V phantom power” or “P48 support” clearly stated in the documentation. If your physical manual’s missing, locate the model-specific datasheet online to verify power requirements before setup. For creators and streamers evaluating affordable microphones, cross-referencing your exact model ensures you’re purchasing compatible equipment.
This documentation clarifies whether you need phantom power, can operate on battery power, or support multiple power options. Musicians and podcasters benefit from understanding these distinctions before investing in audio gear. Understanding how the preamp processes your microphone signal helps you select equipment that matches your power infrastructure. Balanced XLR cables are essential for proper phantom power delivery through pins 2 and 3, so verify your cable configuration matches your microphone’s requirements. Match your exact model number to its corresponding manual before enabling any external power source, ensuring proper microphone compatibility and preventing potential damage.
| Manual Section | Key Language | Power Requirement | Action |
|---|---|---|---|
| Powering/Specs | “Requires 48V phantom” | Mandatory phantom power | Enable phantom |
| Battery notation | “Battery OR phantom” | Optional phantom power | Choose one source |
| Ribbon warning | “Avoid phantom power” | Incompatible | Disable phantom |
| Silent operation | No power specs listed | Contact manufacturer | Verify specs |
Always consult the microphone manual as your first step in any setup process—whether you’re a content creator optimizing streaming audio, a musician recording at home, or a professional selecting equipment for your studio. This practice prevents costly mistakes and ensures your microphone performs at its best.
Identify Your Microphone Type
Once you’ve reviewed your microphone’s manual, the next step involves identifying your microphone type—because different microphone designs have fundamentally different power requirements.
Dynamic microphones don’t need phantom power, making them useful reference points when identifying microphone types for your setup. Condenser mics typically require external power through their internal electronics. However, active ribbon microphones also draw phantom power, complicating the process of identifying what microphone type you’re working with.
Check your connector type: XLR usually indicates phantom-powered designs, while USB microphones receive power differently. Look for specification wording like “P48” or “48V phantom” in your documentation.
These identifying characteristics—connector type, specification language, and microphone design classifications—clarify whether your gear demands phantom power.
Understanding your microphone type is essential for affordable podcast and streaming setups, ensuring you have the right power configuration for creators, gamers, musicians, and recording professionals who need reliable equipment across every stage of their buying journey.
Test Your Power Source
Before connecting your condenser microphone to any power source, you’ll need to test your power source to verify that it can actually deliver the voltage and current your mic requires. Use a voltmeter to measure between pin 1 and pin 2, then pin 1 and pin 3 on your XLR connector. Proper phantom power reads approximately 48V DC on both measurements. Voltage discrepancies indicate microphone compatibility issues.
Testing your power source is essential before setup. Document your source’s specifications and compare them against your mic’s manual requirements. This direct power source testing distinguishes working phantom sources from failing ones, ensuring stable operation and preventing potential damage to your equipment—critical for creators, podcasters, streamers, and recording professionals who depend on reliable gear.
| Test Point | Expected Reading | Unit | Acceptable Range | Action |
|---|---|---|---|---|
| Pin 1 to Pin 2 | 48V | DC | 45–52V | Proceed if within range |
| Pin 1 to Pin 3 | 48V | DC | 45–52V | Proceed if within range |
| AC Voltage | 0V | AC | 0–0.5V | Verify no noise |
| Current Draw | 7mA | Max | 1–10mA | Check source capacity |
| Cable Continuity | Stable | Ohms | <5Ω per pin | Replace if corroded |
Running through this power source testing checklist takes minutes but saves hours of troubleshooting. Whether you’re setting up for gaming streams, podcast recording, or professional audio work, testing your power source upfront guarantees your affordable microphone investment performs reliably from day one.
Why Standard Condenser Mics Depend on Phantom Power
Because condenser microphones contain active circuitry that converts the capsule’s minute output into a usable audio signal, they can’t function without external power. Understanding why standard condenser mics depend on phantom power is essential for anyone setting up a home studio, streaming setup, or podcast recording space.
Your condenser microphone design relies on internal electronics for proper operation:
- Impedance-conversion circuits buffer the capsule’s weak signal to line level.
- Field-effect transistors amplify output before it reaches your XLR connector.
- DC-to-DC converters stabilize voltage for consistent performance.
Without phantom power, these active circuitry requirements remain unmet. You’ll experience signal degradation or complete failure.
The reason standard condenser mics depend on phantom power comes down to this simple truth: these microphones were engineered with powered components from the ground up. The unique function of condenser microphones distinguishes them from dynamic or ribbon microphones that operate passively without external power sources. Professional audio engineers recognize that phantom power isn’t optional—it’s fundamental to condenser microphone design.
Standard 48V delivery guarantees your microphone performs reliably across professional studio environments, whether you’re recording podcasts, streaming gameplay, or laying down music tracks.
For creators and gamers investing in affordable condenser microphones, recognizing that standard condenser mics depend on phantom power means ensuring your audio interface or mixer supports this feature before purchase.
This dependency affects everything from your initial setup to long-term performance consistency.
When Your Condenser Mic Doesn’t Need Phantom Power
Not all condenser microphones require 48V phantom power—understanding when your condenser mic doesn’t need phantom power helps you build a more flexible and cost-effective setup. Several design alternatives supply the necessary bias voltage through different pathways, making it easier for creators and gamers to find affordable options that match their specific needs.
Electret microphones use permanently charged capsules, needing only low-voltage bias from computers or dedicated supplies. This design is particularly popular for budget-conscious podcasters and streamers.
USB microphones draw power directly through your connection, eliminating XLR phantom-power dependency entirely—a major advantage for anyone asking “does my condenser mic need phantom power?” The answer is increasingly no, especially with modern USB designs. USB microphones work by converting analog audio signals to digital format directly within the microphone itself, streamlining the recording process for home studios and mobile setups.
Battery-operated condensers function independently when charged, ideal for portable recording scenarios where your condenser mic doesn’t need phantom power infrastructure. These are excellent for musicians and professionals recording on location.
Tube microphones rely on external power supplies rather than standard phantom configurations, offering a different sonic character for those willing to invest in specialized equipment.
Understanding your specific condenser type and its power architecture lets you choose appropriate audio interfaces and power sources for your setup without unnecessary equipment investment.
For creators evaluating microphones at every stage of the buying journey, recognizing which condensers operate without phantom power opens access to more affordable, practical solutions for podcasting, streaming, gaming, and recording applications.
Troubleshooting: Silent Mic? Check Phantom Power First
- Verify phantom power is enabled on your mixer, interface, or preamp.
- Confirm you’re using a balanced XLR cable, not an unbalanced connection.
- Measure voltage between pins with a meter—you’ll need approximately 48V DC between pin 1 and pins 2 or 3.
A silent condenser microphone** typically indicates power-delivery failure** rather than capsule damage. Before assuming your microphone’s defective, systematically address phantom power settings. Phantom power operates by sending DC voltage through the balanced XLR cable to activate the microphone’s internal electronics.
Most condenser designs require this voltage to function reliably during recording or live streaming applications.
Checking phantom power first is essential for creators, gamers, musicians, and professionals who rely on condenser mics for podcasting, streaming, and recording.
Whether you’re using an affordable microphone setup or premium equipment, silent mic issues are rarely caused by hardware defects—they’re almost always power-related.
This is why checking phantom power should be your first troubleshooting step before attempting any complex repairs or replacements.
What to Do If Your Mixer Won’t Supply Phantom Power
Consider mixer alternatives like audio interfaces or external phantom-power supplies positioned between your mic and mixer. For portable solutions, battery-powered phantom units work well without mains access. XLR-to-USB preamps also deliver direct power to your condenser. Keep in mind that using XLR microphones without an audio interface is possible, though it requires proper phantom power delivery through alternative means.
Before investing in workarounds, verify your mixer’s specs—some provide phantom power selectively on certain channels only.
If your mixer won’t supply phantom power on all inputs, check whether it offers selective activation per channel. Inspect your microphone’s manual to confirm it requires standard 48V phantom power rather than alternative power arrangements.
This setup consideration is especially important for affordable microphones used in podcasting, streaming, or recording environments where your mixer may have limitations.
Understanding how to handle a mixer that won’t supply phantom power ensures your condenser mic performs optimally regardless of your equipment’s capabilities. Knowing what to do when your mixer won’t supply phantom power helps you troubleshoot quickly and maintain consistent audio quality for your content creation needs.
Common Phantom Power Myths That Damage Your Gear
These distinctions separate informed operators from those experiencing preventable failures. Understanding the key differences between condenser and dynamic microphones helps you make appropriate phantom power decisions for your specific microphone type.
For musicians, podcasters, and gaming streamers working with budget-friendly setups, debunking these phantom power myths is essential to protecting your recording equipment and maximizing microphone longevity throughout your content creation journey.








