
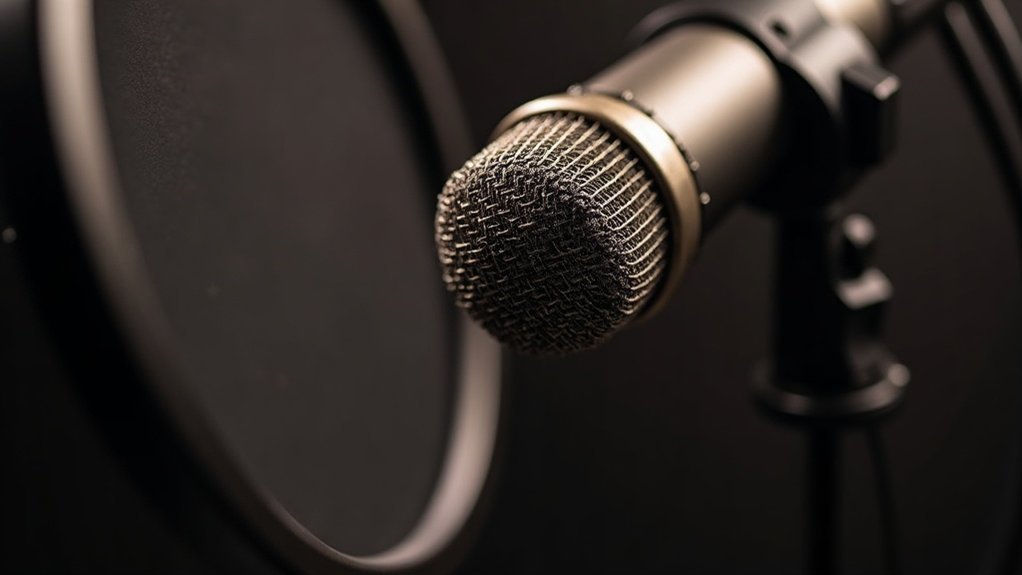
Your microphone sounds distant due to improper gain staging, incorrect device selection, or disabled audio processing. This is one of the most common reasons why microphones sound distant, and fortunately, it’s easily fixable.
You’re likely setting input gain too low—aim for -18 dB average levels instead. Check that you’ve selected the correct input device in both OS and app settings, as system defaults often underpower external mics. Disable noise suppression and audio enhancements, which artificially degrade proximity and contribute to that distant microphone sound you’re experiencing.
Additionally, inspect cable connections for corrosion and verify microphone placement within 4–12 inches of your mouth. Proper positioning is critical; even a few inches difference can make your distant microphone problem noticeably worse.
Each of these factors contributes considerably to perceived distance. Whether you’re streaming, podcasting, gaming, or recording music, addressing them systematically will reveal the specific culprit behind why your microphone sounds distant. For creators and professionals using affordable setups, these tweaks often deliver results comparable to premium equipment—proving that microphone distance issues are typically setup problems, not gear problems.
Key Takeaways
- Insufficient input gain causes distant sound; adjust microphone levels to approximately -18 dB for optimal proximity and clarity.
- Microphone placement too far from mouth reduces vocal presence; position cardioid mics 4–8 inches away for better sound capture.
- Reflective surfaces and poor room acoustics create unwanted reverberations; add acoustic treatment to minimize early reflections affecting audio quality.
- Wrong input device selected in system settings causes weak signal; verify external microphone is set as default in OS and apps.
- Audio enhancements and noise suppression artificially process vocals; disable these features in Sound settings to capture authentic sound without degradation.
Fix Your Microphone Placement and Distance
Position cardioid mics 4–8 inches from your mouth; dynamic mics benefit from 2–6 inches, while condensers work best at 6–12 inches. Angle your mic 45° off-axis to reduce plosives and sibilance. Avoiding corners and reflective surfaces minimizes unwanted reverberations that contribute to that distant quality. Using a shock mount can further reduce vibrations from desk movement that degrade your signal clarity.
Proper microphone placement and distance** directly improves signal-to-noise ratio, minimizing ambient noise capture** in untreated recording environments—critical for podcasters, streamers, and musicians working in home studios. The microphone placement distance relationship is fundamental to achieving professional-quality recordings in any acoustic environment.
Your mic type determines ideal proximity: dynamic cardioids tolerate closer placement due to directional characteristics, whereas condenser sensitivity requires slightly greater distance.
Getting microphone placement and distance right ensures you’re maximizing your affordable microphone’s potential, whether you’re gaming, recording vocals, or streaming content.
Consistent angle adjustments and height maintenance across takes guarantee tonal uniformity throughout your recording session.
Check Your Input Gain and Software Volume Settings
Your microphone’s distant sound often stems from insufficient input gain at the hardware level—whether on your interface, preamp, or mic body—which forces you to compensate with excessive software boosting that amplifies noise and reduces clarity.
You’ll also need to verify your operating system’s input volume slider (found in Windows Settings or macOS Sound preferences), as a low OS-level setting can undermine properly configured hardware gain and produce a thin, remote tone. Aiming for an average input level around -18 dB helps you avoid peaking while maintaining a strong, natural signal. Dynamic microphones typically require higher gain than condensers, so adjust your hardware preamp accordingly based on your microphone type. Understanding how gain works in your signal chain ensures each stage contributes appropriately to your final output without unnecessary amplification at any single point.
Balancing these two stages correctly by setting moderate hardware gain first and then fine-tuning OS volume guarantees a strong, natural signal without the artifacts that make you sound distant or distorted.
Input Gain Levels Matter
Understanding why input gain levels matter is crucial to achieving professional-quality recordings. When input gain sits too low, your microphone’s raw signal gets attenuated before it ever reaches your recording software, which forces the audio to hover dangerously close to the noise floor and creates that distant, weak quality you’re hearing.
Input gain levels matter because they directly control how your microphone signal translates into usable audio. Proper gain staging—one of the most critical input gain level considerations—places your voice clearly above the noise floor, enhancing audio clarity and sound proximity without requiring aggressive downstream processing. Digital microphones typically adjust gain from -6 to -12 dB, providing a practical range for most recording situations.
For streamers, podcasters, and musicians working with affordable microphones, mastering input gain levels matters for bridging the gap between budget gear and professional results. Monitor your audio levels using the color indicators on your USB microphone or the bar meters on your audio interface to ensure you’re capturing signal strength without clipping and distortion. Gain staging fundamentally shapes how your microphone captures sound at the source, making it essential to understand microphone gain’s role in your overall recording chain.
Aim for peaks around −12 dBFS using your preamp settings or interface gain knob. Match your microphone sensitivity to input levels carefully—this step is where understanding input gain levels matters most for your specific setup. This foundational recording technique prevents thin recordings and eliminates the need for heavy post-processing that degrades fidelity.
Why input gain levels matter extends beyond just signal strength; it’s about maximizing the potential of whatever microphone you’ve chosen, whether it’s an entry-level USB condenser or a mid-range dynamic mic.
Getting input gain levels right from the start ensures that creators, gamers, and professionals can achieve clarity and proximity in their voice without fighting against poor foundational settings during post-production.
Software Volume Configuration Issues
Check your OS input volume slider—conservative defaults between 20–50% underpower dynamic microphones and microphone sensitivity settings. Most audio interfaces and DAWs require input levels peaked around −18 to −6 dBFS for ideal presence.
Individual apps maintain separate mic faders independent of system settings, creating level mismatches that exacerbate software volume configuration issues. A distant-sounding microphone can result from these inconsistencies across multiple applications and platforms.
Verify each application’s input gain independently to isolate where software volume configuration challenges originate. Aggressive automatic gain control and noise suppression can artificially lower your vocal level during quieter phrases, introducing that distant character you’re hearing—a hallmark of unresolved software volume configuration problems. Monitoring your levels with LED meters provides faster and more accurate visual feedback to prevent clipping and ensure consistent signal strength across applications.
For affordable microphone setups used in podcasting, streaming, gaming, and recording, proper software volume configuration is just as critical as hardware selection.
Addressing these software volume configuration concerns ensures your budget-friendly or professional microphone performs at its intended level, delivering the presence and clarity your content deserves.
Switch to the Right Input Device
You’ve likely overlooked which microphone your system’s actually using—your OS defaults to a built-in or recently connected device that may not be your preferred mic.
You’ll need to verify your default microphone in system settings, disable any conflicting input devices that could cause automatic switching, and manually select your external mic in both your OS and individual apps like Zoom or Discord. Access your volume mixer to compare your selected input device against other connected microphones and confirm the correct one is active. Check microphone levels by clicking on the “Device properties” link to ensure your preferred mic is operating at optimal volume. If you’re using an XLR microphone connection, make sure your computer has the proper audio interface to receive the signal directly.
This device mismatch is a primary culprit behind distant-sounding audio, even when you’re positioned close to a quality microphone.
Check Your Default Microphone
The Control Panel‘s Sound → Recording tab displays your default mic with a green checkmark. Device Manager confirms system recognition. Look for any warning symbols indicating device issues that may prevent proper microphone functionality.
Before diving into complex audio troubleshooting, make certain your intended microphone—whether USB, headset, or external interface—is actually selected as default. To check your default microphone**** properly, navigate through these settings and verify the correct device is enabled. Understanding your microphone’s frequency response characteristics can also help you identify whether distance issues stem from equipment limitations rather than configuration problems.
Misconfigured defaults commonly cause distant sound because your system defaults to internal laptop mics instead of closer external devices, degrading signal quality across all communication apps simultaneously.
For podcasters, musicians, and professionals investing in affordable microphones for recording and streaming, verifying your default microphone configuration ensures you’re actually capturing audio from your new equipment rather than built-in alternatives.
This fundamental setup step applies whether you’re using a budget USB microphone for gaming streams or a professional external interface. When checking default microphone settings, you’re protecting the investment in your audio quality and ensuring every recording and live stream uses your chosen device.
Disable Conflicting Input Devices
Navigate to Settings → System → Sound → Recording to identify unused microphones—laptop arrays, webcam mics, or headset boom mics. Right-click each inactive device and select Disable.
This input device disabling strategy is essential for creators and streamers who rely on quality audio capture. By systematically disabling conflicting input devices, you eliminate echo, phase issues, and distant-sounding audio that plague multi-device setups.
Whether you’re using an affordable USB microphone for podcasting, a gaming headset, or a professional recording setup, disabling conflicting input devices ensures your chosen mic remains the sole active source.
In Device Manager, uninstall duplicate audio drivers under Audio inputs and outputs. Reducing active input sources through proper conflicting input device management stabilizes your signal path and prevents applications from inadvertently switching between competing microphones during critical recording moments or live streams.
For gamers, podcasters, and musicians, implementing input device conflict disabling is a foundational setup tip that directly impacts audio quality.
This straightforward process takes minutes but dramatically improves consistency across all your recording and streaming applications. Addressing low microphone volume issues often begins with this essential device management step.
Select External Mic Manually
Why does your system keep defaulting to the built-in laptop microphone despite connecting a superior external source?
Selecting your external mic manually guarantees correct input routing, preventing OS “smart” switching that undermines your audio quality impact. You’ll gain these manual mic selection advantages:
- Windows Settings access: Navigate Settings → System → Sound → Input to manually select your external mic or interface, explicitly choosing your USB mic over built-in defaults.
- Input device consistency: Set your external mic as default communications device for standardized behavior across apps, cementing your manual microphone selection as the priority input source.
- Settings verification: Use built-in level meters confirming your selected microphone receives signal and operates at optimal levels.
This microphone compatibility approach locks in superior input routing importance by selecting your external mic manually rather than relying on automatic detection. Understanding the differences between USB and XLR microphones helps you optimize your chosen input device for maximum audio clarity.
Eliminate distant, echoey recordings and establish professional USB mic benefits across all conferencing and recording scenarios.
Whether you’re streaming, podcasting, gaming, or recording professional content, manually selecting your external mic ensures consistent performance and prevents frustrating audio dropouts that plague creators relying on automatic OS switching.
Control Room Reflections and Acoustics
Asymmetrical room geometry intensifies reflection patterns, destabilizing your spatial impression and compromising the acoustic environment. Hard, untreated surfaces generate strong specular reflections that smear transients and reduce microphone proximity—issues that plague affordable microphones and budget setups unless you optimize your control room acoustics****.
Professional acoustic treatment targets these early reflections to at least 10 dB below direct sound, preserving clarity and tightness. Acoustic panels absorb sound energy at critical frequencies, reducing the strength of reflections that otherwise color your recordings with unwanted room character.
For podcasters, streamers, and gamers working with entry-level gear, addressing room reflections and strategic absorption directly counters the distant sound that undermines perceived microphone quality. Many creators assume their affordable microphone is the problem when poor control room reflections and acoustics are actually the culprit.
Inspect Cables, Connections, and Microphone Condition

You’ll often overlook cables and connections as culprits behind distant-sounding audio, yet they’re among the easiest variables to diagnose and correct. Inspecting cables, connections, and microphone condition is fundamental to achieving professional sound quality, whether you’re podcasting, streaming, or recording music on a budget microphone setup.
Examine three critical areas:
- Cable integrity: Inspect for cuts, kinks, or corrosion affecting signal degradation and audio clarity. Damaged cables compromise even the best affordable microphones, so regular cable inspection prevents costly replacements later.
- Connector types and seating: Verify balanced XLR connections are fully seated; loose connectors introduce crackling and level drops. Proper microphone connections and seating ensure consistent audio performance across streaming, gaming, and recording sessions.
- Cable routing and shielding: Route microphone cables away from interference sources like power supplies; excessive cable length and poor shielding attenuate frequencies. Strategic cable management directly impacts your microphone’s condition and overall audio output.
Test connection stability by wiggling connectors—intermittent audio confirms loose seating. Replace damaged cables immediately.
Regularly inspecting your cables, connections, and microphone condition maintains professional clarity essential for content creators and gamers. Quality cable maintenance and proper microphone placement restore professional sound whether you’re using an entry-level or mid-range affordable microphone for your streaming or podcast setup. Incorporating cleaning your microphone into your maintenance routine further ensures optimal audio performance and extends equipment longevity.
Update Drivers and Disable Audio Enhancements
After you’ve confirmed your cables and connections are sound, updating drivers and disabling audio enhancements often emerge as the next critical step behind distant microphone capture. Driver updates and audio enhancement adjustments through Windows Update or Device Manager restore intended gain and sensitivity—essential for creators and gamers relying on clear microphone performance. Access Device Manager, right-click your microphone, and select “Update driver” to search for newer versions. Manufacturer-specific drivers from Realtek or USB mic vendors provide enhanced control panels exposing gain settings that competitive gamers and podcasters need for optimal audio quality.
Additionally, disable audio enhancements in Sound settings—these processing features sometimes introduce distance artifacts that degrade streaming and recording quality. Disabling audio enhancements is particularly important for musicians and professionals who require transparent microphone capture without unwanted processing. After updating drivers and disabling these enhancement features, test your microphone in communication apps to verify clarity improvement across your content creation workflow.
| Method | Path | Benefit |
|---|---|---|
| Windows Update | Settings → Updates | Optimized drivers for microphone performance |
| Device Manager | Search → Update driver | Targeted driver fixes and enhancements |
| Manufacturer Site | OEM support portal | Advanced driver controls and audio settings |
| Sound Settings | Settings → Sound → Advanced | Disable audio enhancements for clarity |
Disable Noise Suppression in Your Settings
Finally, check your microphone’s Enhancements tab and uncheck any noise reduction options.
Understanding common microphone noise sources can help you distinguish between unavoidable background noise and unwanted suppression effects that make your audio sound distant.
You’re also joining countless creators, gamers, and professionals who’ve resolved distant-sounding audio through this layered troubleshooting method—especially those relying on affordable microphones for streaming, podcasting, and recording who need crystal-clear audio without unwanted suppression interfering with their setup.
To properly turn off noise suppression in your settings, test your microphone after each adjustment to confirm improvements.
This systematic approach to disabling audio noise suppression ensures your microphone captures authentic sound without artificial processing degrading your content quality.








