
A polar pattern determines your microphone’s directional sensitivity, controlling which sound sources it captures and which it rejects. Understanding how a polar pattern works is essential for anyone recording podcasts, streaming, or producing music on a budget-friendly setup. Cardioid patterns prioritize front sound while rejecting rear noise; omnidirectional captures equally from all directions; figure-8 accepts front and back while rejecting sides. Each pattern uses phase cancellation to create null points—angles where rejection’s strongest.
Your microphone’s directionality shifts across frequencies, with low frequencies becoming more omnidirectional and highs narrowing markedly. This polar pattern behavior means an affordable microphone’s performance can vary significantly depending on your distance and angle from the source. Learning how polar patterns work allows you to strategically position your mic for ideal isolation and bleed control during gaming sessions, podcast recordings, or live streaming.
The mechanics of polar patterns apply distinctly across different recording situations. When you grasp how a polar pattern functions, you gain the ability to maximize any microphone’s rejection capabilities—whether you’re using a budget model for bedroom streaming or a professional setup in a treated space. This substantial depth to pattern principles directly impacts your final audio quality, making polar pattern knowledge a cornerstone of effective microphone placement and room acoustics management.
Key Takeaways
- Polar patterns define microphone sensitivity in different directions, controlling which sounds are captured and which are rejected.
- Cardioid patterns excel at front-focused recording by rejecting rear and side sound, making them ideal for most applications.
- Omnidirectional patterns capture sound equally from all directions, suitable for acoustically treated room recordings.
- Frequency-dependent behavior means low frequencies remain omnidirectional while high frequencies narrow, affecting pattern performance across the spectrum.
- Null points and rejection zones strategically eliminate unwanted ambient noise and crosstalk without expensive acoustic treatment.
What Polar Patterns Actually Do for Your Recording
Because microphones aren’t equally sensitive in all directions, polar patterns actually do fundamentally shape what you’ll capture before you ever touch a mixing console. Understanding what polar patterns actually do for your recording is essential for any creator, gamer, musician, or professional seeking affordable microphone solutions.
Polar patterns fundamentally shape what you capture before mixing, making them essential for creators seeking clean, affordable microphone solutions.
You control recording clarity by directing pickup sensitivity toward desired sources while rejecting unwanted sound. How polar patterns actually work determines your tonal balance—the same performance yields cleaner or muddier results depending on how off-axis frequencies arrive at the capsule. You’ll manage ambient capture by choosing tighter patterns for isolated recordings or wider patterns when you need room character. These polar pattern effects matter whether you’re podcasting, streaming, gaming, or recording music on a budget. Different microphone types like dynamic microphones with cardioid patterns or condenser microphones with multiple polar options will influence the specific directional sensitivity you achieve. The decibel levels shown in polar pattern diagrams typically range from 0 dB to -20 dB, revealing how microphone sensitivity decreases as sound arrives from off-axis directions.
Strategic mic placement leverages the way polar patterns actually affect your sound to minimize sound coloration from reflections, enabling sound isolation without post-processing intervention and improving your frequency response before mixing begins.
Learning what polar patterns actually do for your recording setup transforms your ability to capture clean audio across every stage of your production journey. By mastering how different polar patterns actually perform, you’ll make informed decisions during your buying journey and maximize the potential of even affordable microphones for your specific use case.
Cardioid, Omnidirectional, and Figure-8 Patterns Explained
When you’re selecting a microphone for recording, you’ll encounter three primary polar patterns—cardioid, omnidirectional, and figure-8—each offering distinct directional characteristics that fundamentally shape your sound capture.
Cardioid patterns reject rear and side sound while emphasizing the front. Omnidirectional patterns accept sound equally from all directions, and figure-8 patterns (formed by combining two cardioid lobes in opposite directions) capture sound from front and rear while rejecting the sides. Directional microphones like cardioid models provide greater working distance in noisy environments compared to omnidirectional options.
Omnidirectional microphones are particularly useful in situations where you need to capture ambient sound from the entire surrounding environment. Your choice among these patterns directly determines how much ambient noise you’ll capture, what proximity effects you’ll experience, and ultimately how isolated or blended your source recording becomes. The proximity effect, which boosts bass response when positioned closer to the microphone, varies significantly across different polar patterns.
The Three Pattern Types
- Cardioid: Combines pressure and pressure-gradient components, delivering polar pattern advantages through rear rejection while maintaining recording clarity at the front. This pattern type dominates podcasting and streaming setups where you need focused sound capture. The cardioid pattern’s back sensitivity can be 20 dB less than front sensitivity, making it highly effective at isolating your voice or instrument. Cardioid microphones exhibit a proximity effect that boosts low frequencies when positioned close to sound sources.
- Omnidirectional: Functions as a true pressure transducer, capturing equal sensitivity across all directions with maximum ambient pickup. Among the three pattern types, this excels in room recording and capturing natural ambience. Omnidirectional microphones are particularly useful for capturing environmental sound characteristics in their entirety without directional bias.
- Figure-8: Operates as a pure pressure-gradient transducer, rejecting side angles while accepting front and rear equally. This pattern type offers versatility for professional recording applications.
Understanding the three pattern types in depth enables you to select the ideal microphone for your specific acoustic environment and recording objectives.
Whether you’re building a podcast setup, streaming gaming sessions, or recording music, knowing how these three pattern types function ensures you invest in affordable microphones that match your actual needs rather than overpaying for unnecessary features.
Pattern Selection For Recording
Omnidirectional patterns thrive in acoustically treated spaces, capturing natural ambience without proximity effect coloration, perfect for ensemble recording. Musicians and professionals investing in quality microphones often leverage this pattern when working in controlled environments designed for ambient capture. The true null for cardioid microphones occurs directly behind the source, simplifying stage setup and feedback prevention.
Figure-8 patterns provide front-and-rear capture with side rejection, essential for face-to-face interviews and M/S stereo techniques. Gamers and content creators frequently overlook this option, yet it’s invaluable for duet streaming or collaborative recording sessions. For more specialized applications, supercardioid and hypercardioid microphones offer even tighter pickup patterns with distinctive lobing characteristics suited to specific isolation requirements.
Your pattern selection hinges on balancing environmental control against desired acoustic character.
Whether you’re recording podcasts in a bedroom, streaming gameplay, or capturing instrument performances, the right polar pattern selection ensures you’ll capture clean, isolated tracks or cohesive ambient soundscapes depending on your specific recording needs.
Understanding these distinctions guides you toward affordable microphones that deliver maximum performance for your unique setup and content goals.
How Polar Patterns Change at Different Frequencies
Because polar patterns are inherently frequency-dependent, the directional characteristics you’ll see at low frequencies differ substantially from those at mid and high frequencies.
Your microphone’s directivity changes across the spectrum due to wavelength interactions with capsule geometry. This frequency-dependent behavior directly impacts your recording quality regardless of your budget tier.
Here’s what you’ll encounter:
- Low frequencies drift toward omnidirectional behavior as long wavelengths weaken phase cancellation, meaning your polar pattern becomes less directional at bass frequencies.
- Mid frequencies exhibit nominal pattern specs, typically measured at 1 kHz in anechoic conditions—this is where manufacturers establish their primary polar pattern claims.
- High frequencies narrow considerably through sound diffraction, tightening cardioid patterns toward supercardioid characteristics, which affects how your microphone rejects off-axis sound.
Polar Pattern Frequency Response in Real-World Use
Manufacturers document these directivity changes via frequency-dependent polar variation curves. Different microphone polar patterns offer varying levels of rejection depending on your vocal recording needs and room environment.
When evaluating microphones for your setup, understanding how polar patterns shift across frequencies helps you predict actual performance in your recording space. Each polar curve describes directivity at a specific frequency band, so comparing curves reveals how your microphone’s pickup pattern transforms across your operating range.
Quality microphone design minimizes polar variation, maintaining consistent pattern stability across your working bandwidth—a critical factor whether you’re streaming on a budget or investing in mid-range equipment.
For podcasters, gamers, and musicians, recognizing this frequency-dependent polar pattern behavior ensures you position your microphone correctly and achieve predictable rejection of room noise and off-axis sources throughout your entire frequency range.
Why Polar Patterns Reduce Bleed and Isolate Sources
You’ll control which sounds reach your mic by aiming the polar pattern‘s rejection zones—nulls and low-sensitivity angles—directly at unwanted sources like nearby instruments or monitors.
When you select a tighter pattern like supercardioid or figure-8, you’re trading omnidirectional pickup for steep attenuation curves that reject off-axis bleed while preserving on-axis signal, typically achieving 15–25 dB of real-world isolation at null angles.
Coordinating multiple mics with complementary polar patterns and orientations further reduces crosstalk between channels, letting you capture isolated sources in dense stage or studio layouts without heavy processing. For example, combining a cardioid mic with a supercardioid positioned at different angles creates overlapping rejection zones that effectively minimize interference from adjacent instruments. The choice between cardioid and omnidirectional patterns fundamentally determines your mic’s ability to reject unwanted sound from all directions or capture equally from every angle.
Directional Rejection Of Sound
- Null points create the strongest rejection, with cardioid mics rejecting at 180° and figure-8 patterns rejecting at 90° and 270°.
- Off-axis attenuation reduces sensitivity gradually as sources move away from on-axis positioning.
- Measured rejection quantifies performance in decibels, typically ranging from 20–25 dB for standard cardioid patterns.
This strategic rejection of sound through directionality isolates your intended source from nearby instruments and room noise—essential for podcasters, streamers, and musicians recording on a budget. The cardioid pickup pattern is particularly popular for single-source isolation due to its strong rear rejection capabilities.
When you’re comparing affordable microphones for gaming setups or vocal recording, the directional rejection capabilities become a critical differentiator. A mic with strong directional sound rejection at null points will dramatically reduce background noise and room reflections, meaning you’ll spend less time editing and more time creating.
For creators working in untreated spaces, mastering how to leverage a microphone’s directional rejection properties transforms even modest equipment into a professional isolation tool.
Controlling Direct Versus Room
A microphone’s polar pattern fundamentally controls direct versus room ambience by defining relative sensitivity across the front, sides, and rear axes. Directional patterns like cardioid compress the direct-to-room level, delivering ~20–25 dB rear attenuation that suppresses ambient capture and sound spill.
When controlling direct versus room sound, you exploit isolation techniques by positioning unwanted sources into rejection zones—leveraging off-axis polar sensitivity to minimize crosstalk. Supercardioid and hypercardioid patterns tighten this control further, while figure-8 designs place rejection zones at 90° sides, offering distinct approaches to managing direct versus room dynamics. Supercardioid microphones excel in high-isolation applications where rejecting side and rear ambient noise is critical for capturing clean sources in untreated environments.
Proximity control reinforces pattern selectivity: increasing distance between microphones and sources reduces room reflections, enhancing source isolation and mix clarity in multi-instrument environments.
For content creators, gamers, and musicians working with affordable microphones, mastering the balance between direct versus room capture becomes essential for professional-quality podcasts, streams, and recordings. By understanding how to control direct versus room interference through strategic microphone placement and pattern selection, you maximize isolation even with budget-friendly gear.
This direct versus room management technique ensures clarity whether you’re recording in treated studios or untreated spaces, making it a foundational skill for anyone serious about recording quality audio without expensive acoustic treatment.
Multi-Mic Isolation Techniques
Once you’ve positioned your microphone to control direct versus room capture, the next challenge emerges in multi-mic setups: preventing one microphone from picking up sound intended for another—a problem called bleed or crosstalk.
Multi-mic isolation techniques are essential for maintaining clean, professional recordings across podcasting, streaming, and music production.
Your multi-mic isolation strategies rely on deliberate null placement. Consider these core techniques:
- Cardioid patterns reject rear sound, isolating adjacent sources in close-mic arrangements—a foundational approach within multi-mic isolation techniques for affordable setups.
- Figure-8 nulls eliminate side pickup, ideal when sources face each other and represent an advanced isolation method in multi-mic isolation approaches.
- Supercardioid/hypercardioid patterns narrow acceptance areas for maximum isolation in loud environments, delivering professional-grade multi-mic isolation without premium pricing.
These isolation techniques for multi-mic setups work by leveraging polar pattern physics rather than expensive acoustic treatment. Selecting the best polar pattern for your specific noise environment ensures optimal rejection of unwanted background sound while maintaining isolation between sources.
For creators and professionals working with budget-conscious equipment, understanding these multi-mic isolation fundamentals means the difference between usable recordings and those plagued by unwanted crosstalk.
Pressure vs. Pressure-Gradient: The Physics That Creates Directionality
To understand how microphones achieve directionality, you’ll need to distinguish between two fundamental physical concepts: pressure vs. pressure-gradient. This pressure vs. pressure-gradient distinction is what separates omnidirectional microphones from directional ones, making it essential knowledge for creators, gamers, musicians, and professionals selecting affordable microphones for podcasting, streaming, and recording.
Pressure acts as a scalar quantity—force per unit area applied equally in all directions. Pressure-gradient, conversely, is a vector describing the rate and direction of maximal pressure change. Understanding the difference between pressure and pressure-gradient fundamentally shapes directional sensitivity and determines whether your microphone will pick up sound from all angles or reject off-axis sources.
| Concept | Definition |
|---|---|
| Pressure | Scalar force per unit area |
| Pressure-Gradient | Vector rate of pressure change |
| Gradient Force | −∇P/ρ (directed high→low) |
| Sound Incidence | Angular arrival of acoustic waves |
| Directional Sensitivity | Output variation with angle |
Only when pressure varies unevenly across surfaces—when gradients exist—do net forces emerge. You’ll find that pressure-gradient microphones expose diaphragms to both front and back surfaces, generating output proportional to spatial pressure differences. The different types of microphones available today utilize these pressure and gradient principles in distinct ways to achieve their specific characteristics. This pressure versus pressure-gradient mechanics principle directly creates the bidirectional polar patterns you encounter in studio work, whether you’re recording podcasts, streaming gameplay, or capturing professional audio. For creators evaluating affordable microphone options, grasping pressure vs. pressure-gradient physics explains why cardioid and figure-eight patterns outperform omnidirectional designs in controlled recording environments.
Reading a Polar Chart: What the Rings and Lobes Mean
Now that you understand how pressure-gradient mechanics create directionality, you’ll need to decode the visual language that manufacturers use to document these patterns: reading a polar chart****.
A polar chart is a sensitivity mapping tool where concentric rings represent magnitude levels and radial lines mark degrees. When reading a polar chart, interpret what you’re seeing through three key elements:
- Ring interpretation establishes calibration—each circle quantifies relative output, typically percentage-of-maximum or dB attenuation. Understanding what the rings mean helps you assess how your microphone handles output at different sensitivity levels.
- Lobe analysis reveals directional behavior—main lobes show peaks, side lobes expose secondary sensitivity, nulls identify rejection zones. Learning what the lobes mean is essential for determining where your microphone picks up sound most effectively and where it rejects unwanted noise.
- Axis alignment and null identification anchor your pattern visualization to the microphone’s on-axis reference point. This positioning is critical when reading polar charts for real-world applications like podcasting, streaming, or recording.
This polar chart calibration transforms three-dimensional pickup into readable two-dimensional direction understanding. Frequency response characteristics also influence how a microphone’s polar pattern performs across different frequency ranges, affecting your overall recording quality.
For creators, gamers, musicians, and professionals selecting affordable microphones, mastering polar chart interpretation ensures you choose the right tool for your specific recording environment and application.
Using Polar Patterns to Control Room Sound and Proximity Effect
Understanding polar patterns to control room sound and proximity effect is essential for anyone recording in untreated spaces. Because polar patterns determine how a microphone responds to sound arriving from different angles, they’re your primary tool for managing the balance between direct sound and room reflections—making them fundamental to controlling room sound effectively.
Cardioid patterns reject rear sound, reducing room ambience in untreated recording environments, while figure-8 designs capture front and rear while rejecting sides, positioning nulls toward problematic sources. Supercardioid patterns narrow frontal pickup for enhanced sound isolation in louder spaces. Figure-8 microphones are particularly useful in controlled recording setups where you want to capture sound from the front and back while eliminating side reflections.
When using polar patterns to control room sound, strategic microphone placement becomes critical—positioning rejection zones toward unwanted reflections maximizes audio clarity without requiring extensive acoustic treatment.
Proximity effect varies significantly by pattern, and understanding how polar patterns interact with proximity effect helps you maintain tonal balance during recording. Directional mics boost bass at close range, and this interaction between polar patterns and proximity effect can either enhance warmth or create muddy low-end depending on your setup and source distance.
For budget-conscious creators, gamers, and streamers, mastering polar patterns to control room sound and proximity effect eliminates the need for expensive acoustic panels. By selecting the right polar pattern for your space and learning to position your microphone strategically within your rejection zones, you’ll capture professional-quality audio that rivals setups costing significantly more.
This foundational knowledge applies across podcasting, streaming, gaming, and professional recording applications.
Choosing the Right Polar Pattern for Your Recording Situation
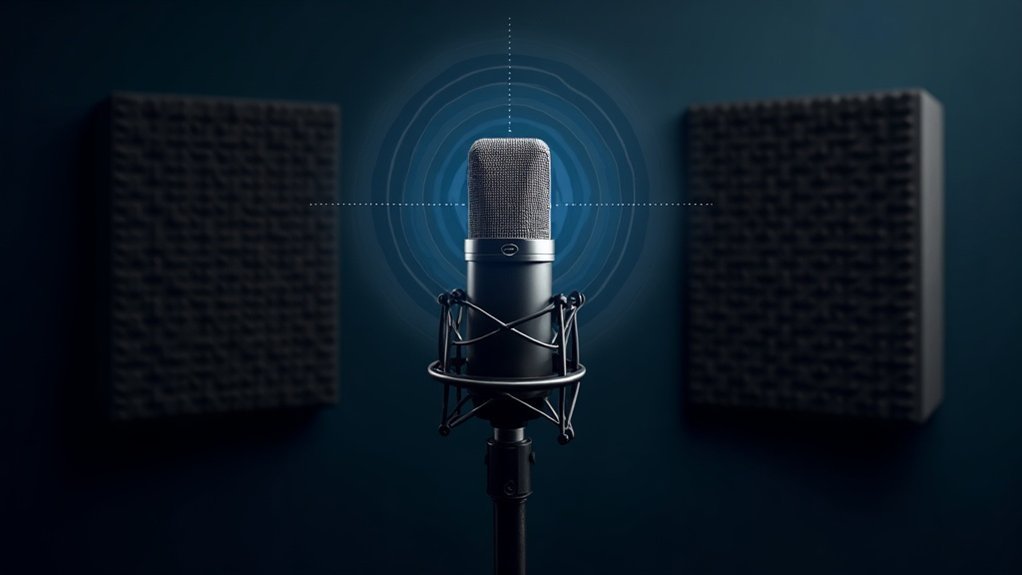
• Sound sources and isolation strategies****: Cardioid patterns excel for lead vocals and single instruments; supercardioid handles noisy environments requiring stronger bleed reduction. Bidirectional microphones offer unique applications when you need to capture sound from two opposite directions simultaneously.
When selecting the right polar pattern****, consider whether you’re recording in a treated studio or untreated space, as this directly impacts your isolation capabilities and microphone performance.
• Room acoustics and ambient noise**: Untreated spaces demand directional patterns** for tonal balance; treated rooms tolerate omnidirectional pickup for natural soundstage control.
Understanding how to choose the right polar pattern for your recording situation means assessing your room’s acoustic properties and ambient noise floor before committing to a microphone purchase.
Assess your room’s acoustic properties and ambient noise floor before committing to a microphone purchase.
• Microphone positioning and performance dynamics****: Cardioid tolerates moderate placement shifts; hypercardioid requires precise aiming to maintain vocal body and reject off-axis interference.
Getting the right polar pattern for your specific recording situation ensures your microphone investment delivers consistent results across different recording contexts—whether you’re streaming, podcasting, gaming, or producing music.








