
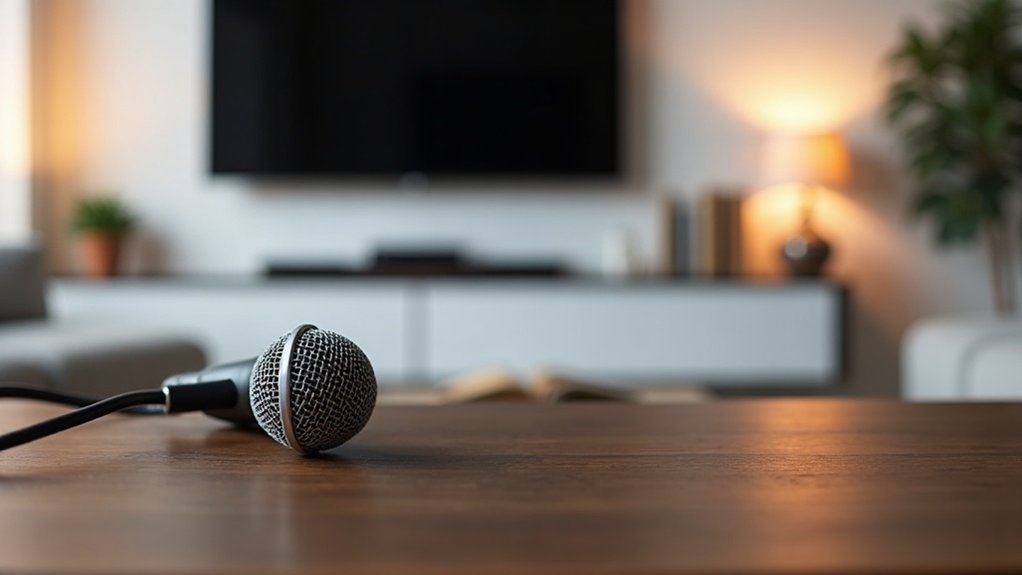
Yes, you can connect a microphone to a TV, which can significantly enhance audio for activities like karaoke or gaming. When considering how to connect a microphone to a TV, you have several options, including USB, Bluetooth, and wired dynamic microphones that suit various setups. Be sure to check your TV’s ports for compatibility, such as USB or 3.5 mm audio inputs. Wired mics provide reliable connections, while wireless options offer greater mobility. If you’re interested in detailed guidance on how to connect a microphone to a TV, including setup and troubleshooting tips, there’s plenty more to explore on this topic. This knowledge can be particularly valuable for creators, gamers, and musicians looking to elevate their audio experience.
Key Takeaways
- Check your TV’s user manual for compatible microphone input options like USB, Bluetooth, or dedicated audio jacks.
- USB microphones can be directly connected to USB ports labeled for audio input on smart TVs.
- Wireless microphones require Bluetooth capability; ensure your TV supports Bluetooth audio connection.
- Wired microphones need a dedicated mic input; use adapters if necessary, like XLR to 3.5 mm.
- Troubleshoot unrecognized microphones by verifying input settings and checking volume configurations.
What Types of Microphones Can Connect to a TV?
When it comes to what types of microphones can connect to a TV, understanding the various options available is essential for creators, gamers, musicians, and professionals alike.
You can choose from dynamic wired microphones, USB microphones, and wireless options. Dynamic mics, such as those with 3.5 mm jacks, connect directly to your TV’s analog inputs, making them a straightforward choice for those looking to enhance their audio experience. Additionally, wired 3.5mm dynamic mics offer near-zero latency, making them particularly effective for karaoke and voice input. However, keep in mind that standard dynamic microphones cannot connect directly to video processors, which may limit your setup options. In contrast, USB microphones can provide enhanced audio quality and additional features when connected to compatible devices.
On the other hand, USB microphones are ideal for smart TVs that support USB audio, offering features like gain control and noise reduction.
Additionally, wireless microphones, including Bluetooth and RF types, provide mobility but may introduce some interference.
Identifying Your TV’s Compatible Ports
To connect a microphone to your TV, start by identifying the common port types available, like USB, HDMI, or audio jacks. Check your TV specifications and user manual to determine which ports support audio input. Pay close attention to port labels, as they indicate whether a connection can accept a microphone or is solely for output. Additionally, you may need a Type-C to USB converter if your microphone uses a Type-C port for connection. Many modern TVs also support USB microphones, making the connection process even simpler. This compatibility allows you to take advantage of digital audio quality, enhancing your overall viewing experience.
Common Port Types
Identifying your TV’s compatible ports is essential for successfully connecting a microphone. Most modern TVs feature HDMI ports, which guarantee high audio quality but don’t directly accept microphone input. Instead, you’ll need an external device like a mixer. Additionally, using an XLR microphone without an audio interface is not common, so ensure your mixer can accommodate such connections. Alternatively, look for a 3.5 mm jack labeled *Audio In* or *Mic In*, which allows direct microphone connections if it supports input. RCA jacks can also serve for audio input, provided they’re connected through an external mixer. Keep in mind that optical cables are primarily used for audio output and won’t facilitate microphone connections. Additionally, not all TVs support direct microphone input, so it’s crucial to check compatibility before making a connection.
Checking TV Specifications
**
Understanding your TV’s specifications is essential for effectively connecting a microphone, especially when considering affordable microphones for podcasting, streaming, gaming, and recording. Not all ports serve the same function, so it’s crucial to check your user manual or the manufacturer’s support site for detailed specifications and connectivity options.
Look for terms like “USB audio input,” “Mic In,” or “Bluetooth audio support,” which indicate potential compatibility for connecting your microphone. Be aware that many ports, such as HDMI and optical, are designed for audio output, not input. Following manufacturer guidelines will help you identify compatible ports, ensuring you avoid frustration when verifying USB and Bluetooth capabilities for your TV audio compatibility with your microphone. This knowledge is vital for creators, gamers, and musicians who rely on quality audio connections, as some smart TVs support HDMI or RCA inputs for microphone connection. Additionally, always remember to check for compatibility with external audio devices to ensure a seamless setup. Wireless microphones can provide greater flexibility in movement during recordings, making them a popular choice for various applications.
Identifying Input Labels
With a solid grasp of your TV’s specifications, the next step in identifying input labels is pinpointing the compatible ports for microphone connectivity.
Look closely at input identification by checking HDMI labels like HDMI 1, 2, or 3, but remember that specialized labels such as HDMI ARC/eARC aren’t suitable for microphones. Instead, focus on finding AV, Audio In, or Line In labels, which are potential analog audio connections for your microphone setup. Avoid ports marked as Optical Out or Audio Out, as these only send audio signals. By understanding the significance of input labels, you can effectively connect your microphone. This knowledge is essential for maximizing your TV’s capabilities and enhancing your audio experience, especially for creators, gamers, musicians, and professionals seeking affordable microphones for podcasting, streaming, gaming, and recording, as selecting the right port is crucial for achieving optimal performance. Additionally, understanding that HDMI connections support audio transmission can help clarify why certain ports are unsuitable for direct microphone connection. Furthermore, using balanced audio connections can significantly reduce noise interference, making them ideal for high-quality audio setups.
Wired vs. Wireless: Which Microphone Connection Is Best?
When choosing between wired and wireless microphones for your TV, consider both the advantages and compatibility factors. Wired options provide reliable connections and simplicity, while wireless systems offer mobility and flexibility. Understanding your TV’s input capabilities is essential to guarantee peak performance, regardless of the choice you make. Additionally, wireless microphones are commonly used in various settings, enhancing their appeal for dynamic TV applications.
Wired Connection Advantages
For starters, wired mics provide exceptional audio quality with stable, consistent signals, minimizing dropouts and interference. You’ll also enjoy near-zero latency, ensuring your audio stays perfectly in sync with your TV’s visuals.
Plus, wired connections eliminate the hassle of batteries, reducing long-term costs and maintenance. With easy plug-and-play setups, you can connect effortlessly to various devices. Additionally, many condenser microphones require phantom power to operate effectively, making wired connections essential for optimal performance.
Wireless Connection Benefits
Wireless microphones allow for free movement around the room, eliminating cable constraints and supporting dynamic applications like karaoke or gaming. This cable-free operation not only enhances convenience but also improves safety by removing trip hazards.
With modern wireless technology, you can enjoy high audio clarity that rivals wired systems, ensuring clear and intelligible sound for all your needs. Additionally, Bluetooth microphones are designed to provide reliable performance in various settings, making them a versatile choice for many users.
The quick setup and discreet hardware placement contribute to a clean, professional aesthetic.
Ultimately, embracing the benefits of a wireless connection enhances your overall experience while keeping your space organized and safe, making it an ideal choice for creators, gamers, and musicians alike.
Compatibility Considerations
Choosing the right microphone connection for your TV hinges on several compatibility considerations, especially between wired and wireless options.
When discussing these compatibility considerations, it’s essential to note that wired microphones deliver superior audio quality with zero latency, making them ideal for karaoke or live dialogue. However, they often require adapters due to limited TV ports.
On the other hand, wireless systems provide the freedom of movement that many creators, gamers, and musicians appreciate, though they can suffer from slight audio degradation and latency. They also necessitate a compatible receiver.
Ultimately, your user preferences will guide the choice: opt for wired for reliability in stationary setups, or wireless for dynamic activities. Additionally, it’s worth noting that dynamic microphones do not require external power, making them a convenient choice for various setups.
Connecting a USB Microphone to Your TV

To ensure a seamless setup when connecting a USB microphone to your TV, follow these steps:
- Check TV Specs: First, verify that your TV supports USB audio input for optimal performance.
- Locate USB Port: Identify the USB port on your TV, typically labeled as USB 2.0 or USB 3.0.
- Plug In the Mic: Connect your USB microphone directly to the TV’s USB port for immediate use.
- Adjust Settings: Navigate to Settings → Sound → Audio Input Device and select your USB mic to ensure it’s recognized.
Make sure your TV’s audio compatibility aligns with the microphone for the best results. USB microphones are often preferred for their ease of use and ability to deliver high-quality sound without the need for complex setups.
By connecting a USB microphone to your TV, you can transform your audio experience, making it perfect for any entertainment activity.
Enjoy the upgraded sound quality!
How Do You Pair Your Bluetooth Microphone With Your TV?
How Do You Pair Your Bluetooth Microphone With Your TV?
How can you easily pair your Bluetooth microphone with your TV? First, check your TV’s compatibility in the manual or settings menu under Bluetooth or Connections.
Make certain your microphone is powered on and in pairing mode, which is usually activated by a specific button sequence.
Next, enable Bluetooth on your TV by navigating to the appropriate settings menu.
Start a device scan to find your Bluetooth microphone. Select it from the list to initiate the pairing process, entering a PIN if required.
Confirm the connection with an on-screen message or an LED change, and test functionality to ensure a successful Bluetooth setup.
Following these steps will help you effectively connect your microphone, enhancing your TV experience for gaming, streaming, or podcasting.
Connecting Wired Microphones: 3.5 Mm and XLR Explained
While Bluetooth microphones offer wireless convenience, connecting wired microphones like 3.5 mm and XLR microphones can provide reliable audio quality for your TV setup.
Understanding how to connect wired microphones: 3.5 mm and XLR explained can significantly enhance your audio experience. Here’s how to connect them effectively:
Connecting wired microphones like 3.5 mm and XLR can greatly improve your audio quality for an enhanced TV experience.
- Check your TV’s input: Confirm it has a dedicated mic input, labeled as “Mic” or “Audio In.”
- Use appropriate adapters: For XLR mics, consider using an XLR-to-3.5 mm adapter to ensure compatibility.
- Adjust audio settings: Select the correct audio input source in your TV settings to optimize sound quality.
- Monitor cable quality: Invest in good-quality cables to minimize noise and signal loss, which is crucial when connecting wired microphones. Additionally, remember that XLR microphones require an audio interface to connect properly to most computers.
Common Issues When Connecting Microphones to TVs

Common issues when connecting microphones to TVs can significantly hinder audio performance. One frequent problem is unrecognized microphones, often due to a lack of audio input support or compatibility issues.
Even if your TV indicates a connection, sound may not route correctly if the input source isn’t set properly. During your troubleshooting process for connecting microphones to TVs, it’s essential to check for volume misconfigurations and verify that all cables are functional.
For those using wireless microphones, don’t forget to check the battery status. Additionally, be mindful of audio quality problems, such as distortion or feedback, which can arise from input gain mismatches or poor-quality cables. Ensuring microphone detection issues are addressed early can save time and improve your overall experience.








